Objective
To display data in a generated document by using AutoTag "tags"
Procedure
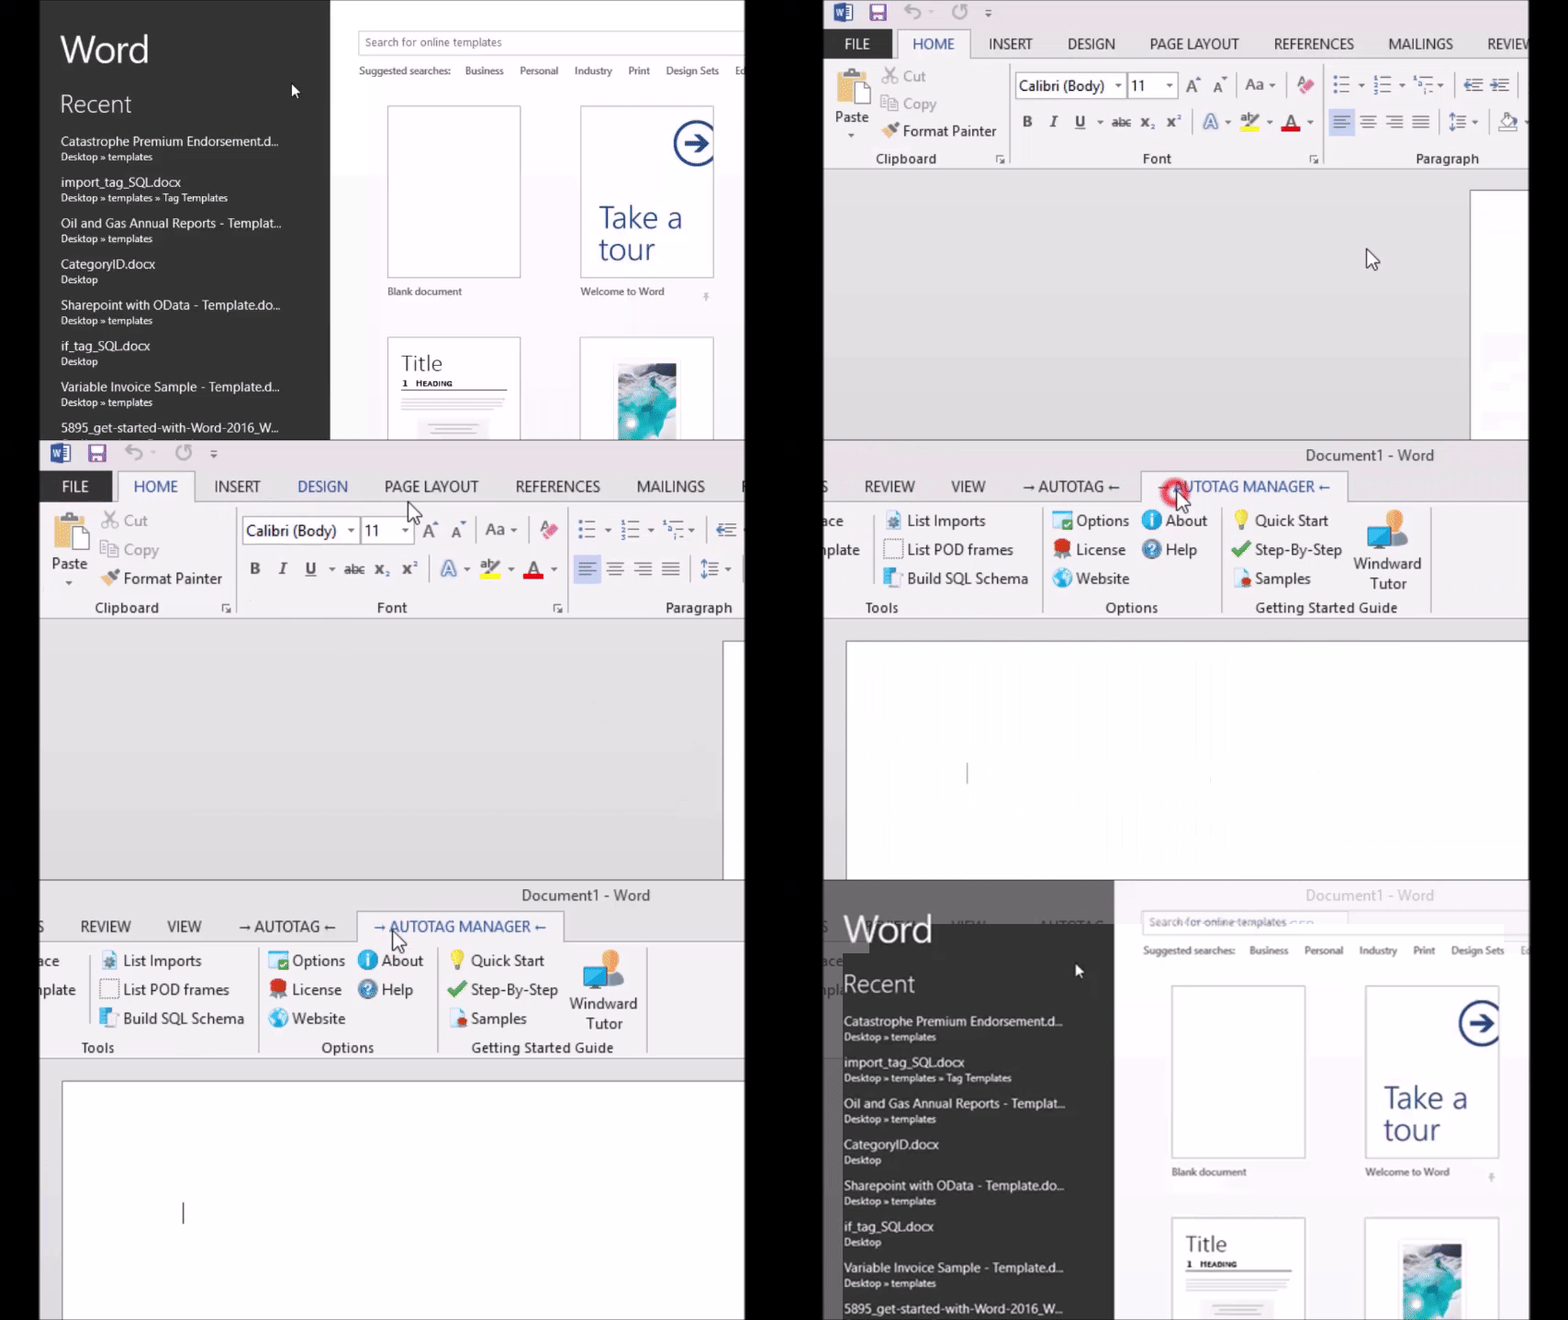
1. Open the AutoTag Manager Ribbon
All of the AutoTag buttons are contained within the AutoTag Manager and AutoTag ribbons. In all of the tutorials here, if you are unsure of where to find a button, check both of these ribbons first.
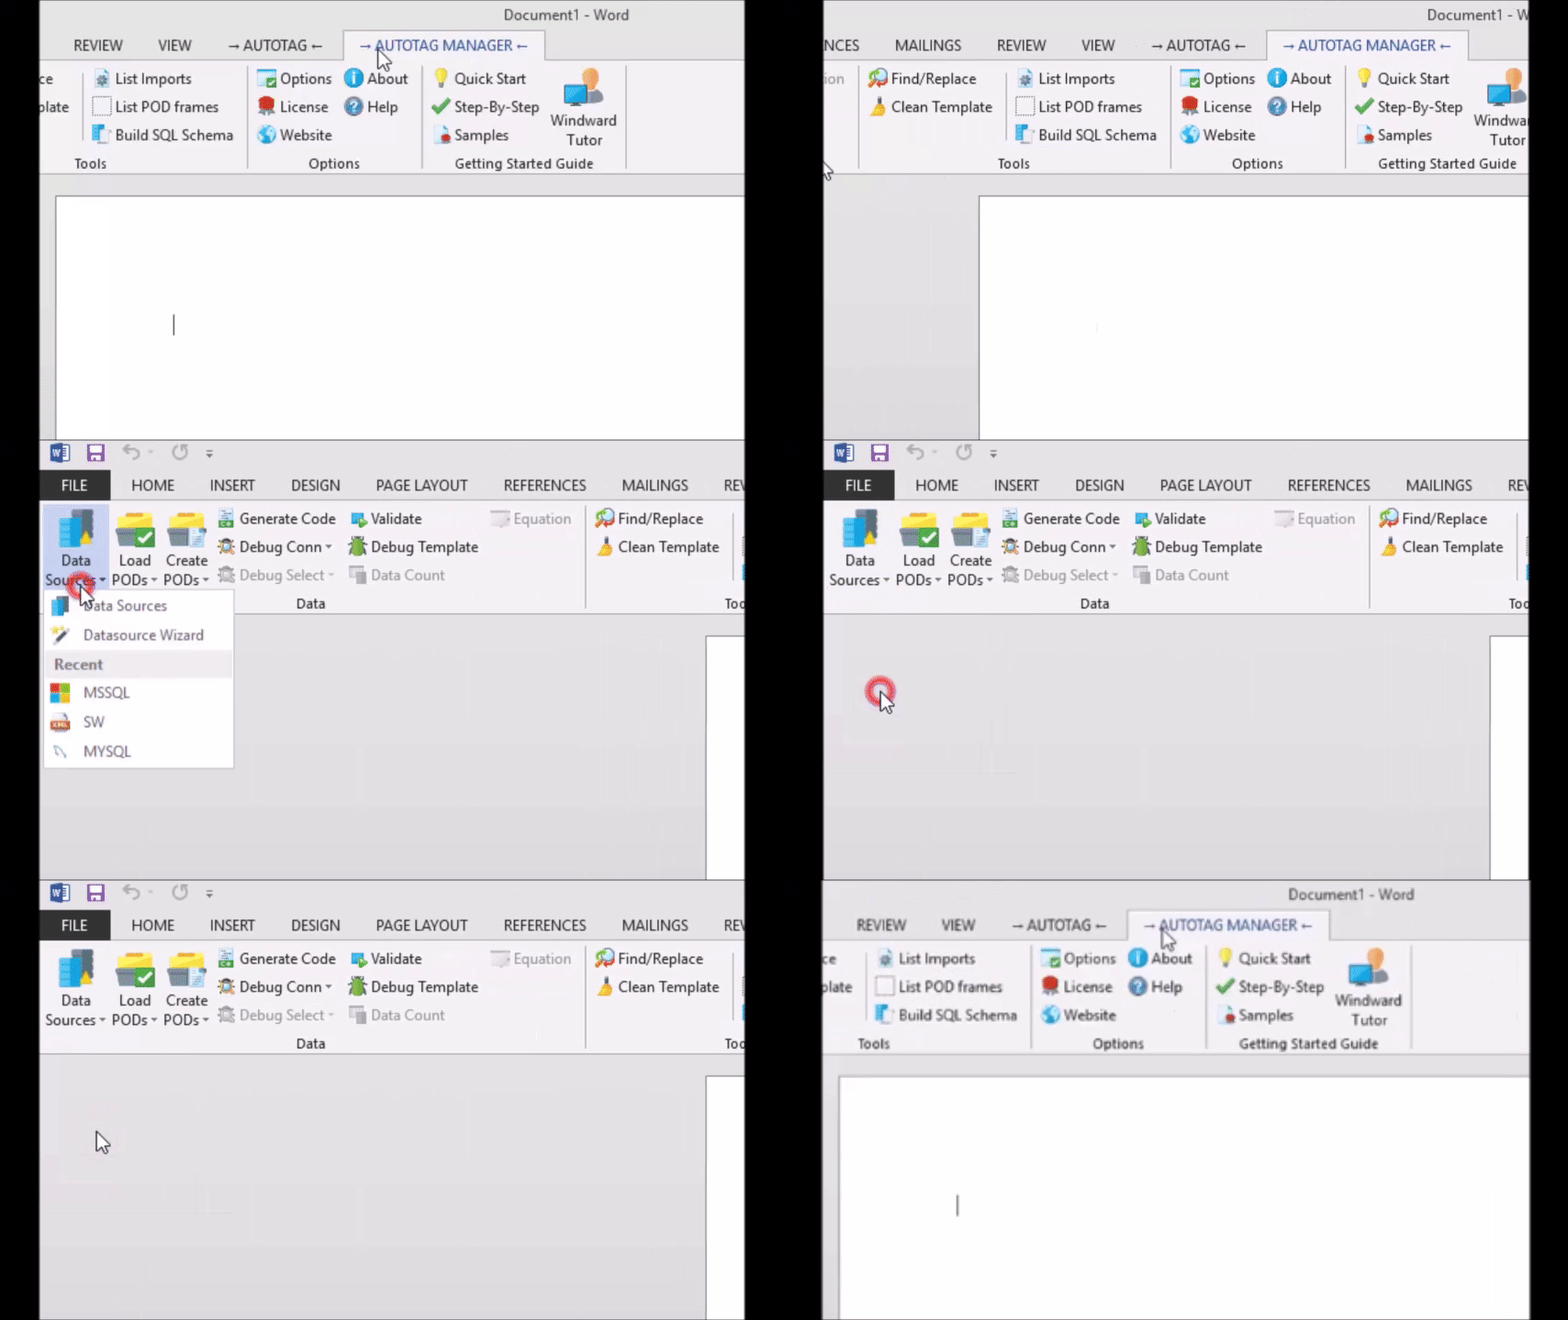
2. Load the MSSQL Sample Datasource
Load the MSSQL datasource by clicking the bottom half of the "Data Sources" button, and selecting MSSQL. If there is no MSSQL option in the drop down menu, you may select another datasource, or follow the instructions in the "Creating a SQL datasource" tutorial.
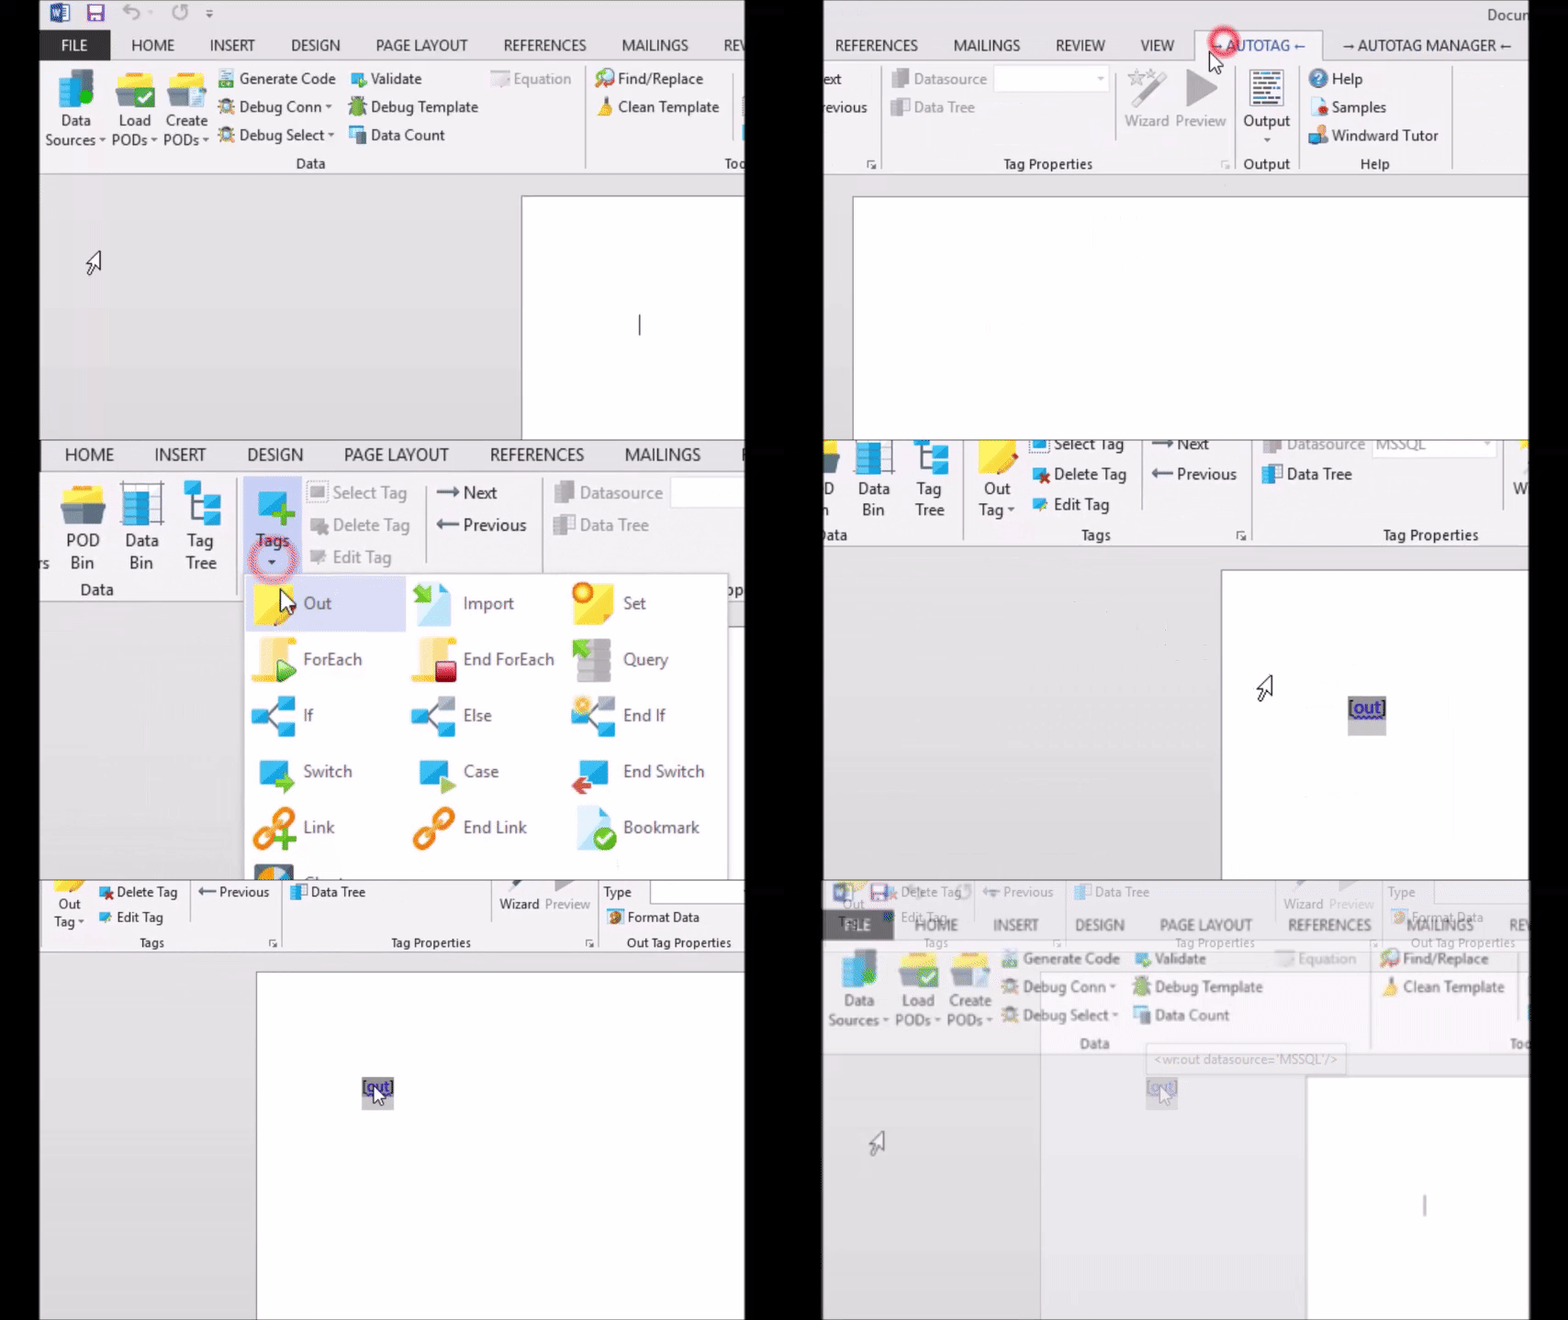
3. Insert an "Out" Tag
AutoTag uses "tags" to change what is displayed in a generated document. The most common is the "Out" tag which is what we will use here. You can insert one by opening the "AutoTag" ribbon, clicking "Tags" and then selecting "Out"
The tag will show up as text in the Word document, surrounded by square brackets to indicate that it is a tag. Anytime you select the tag, it is highlighted and buttons in the AutoTag ribbon change to reflect the tag that is selected.
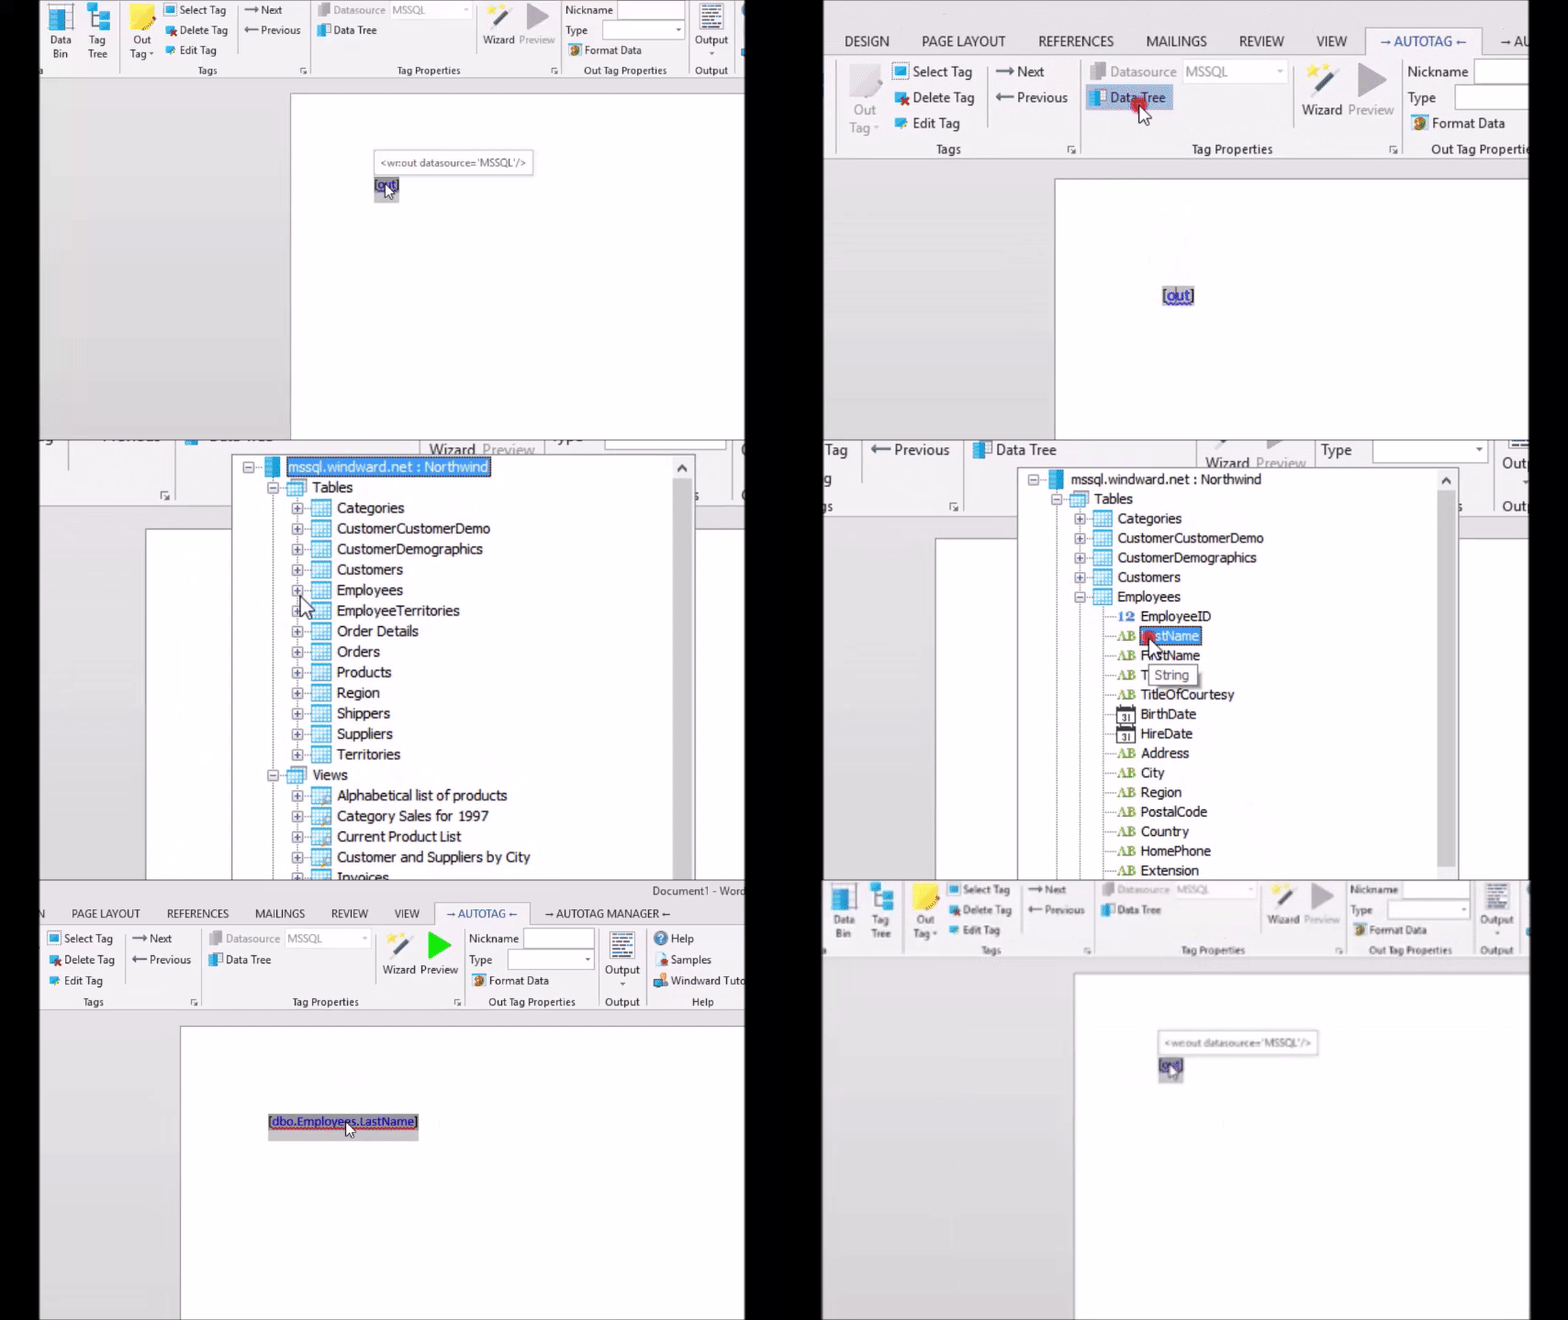
4. Apply Data to the Out Tag
Now you may be wondering how to actually use an Out tag to display data. This is simple: simply select what column you would like to display from the Data tree. You can find the Data tree in the AutoTag ribbon right in the center.
Later, we will look at how to display multiple rows of data in different ways, but for now this will only display the first row of data. When you see the results, don't be disappointed. You are learning fast!
5. Name the Tag
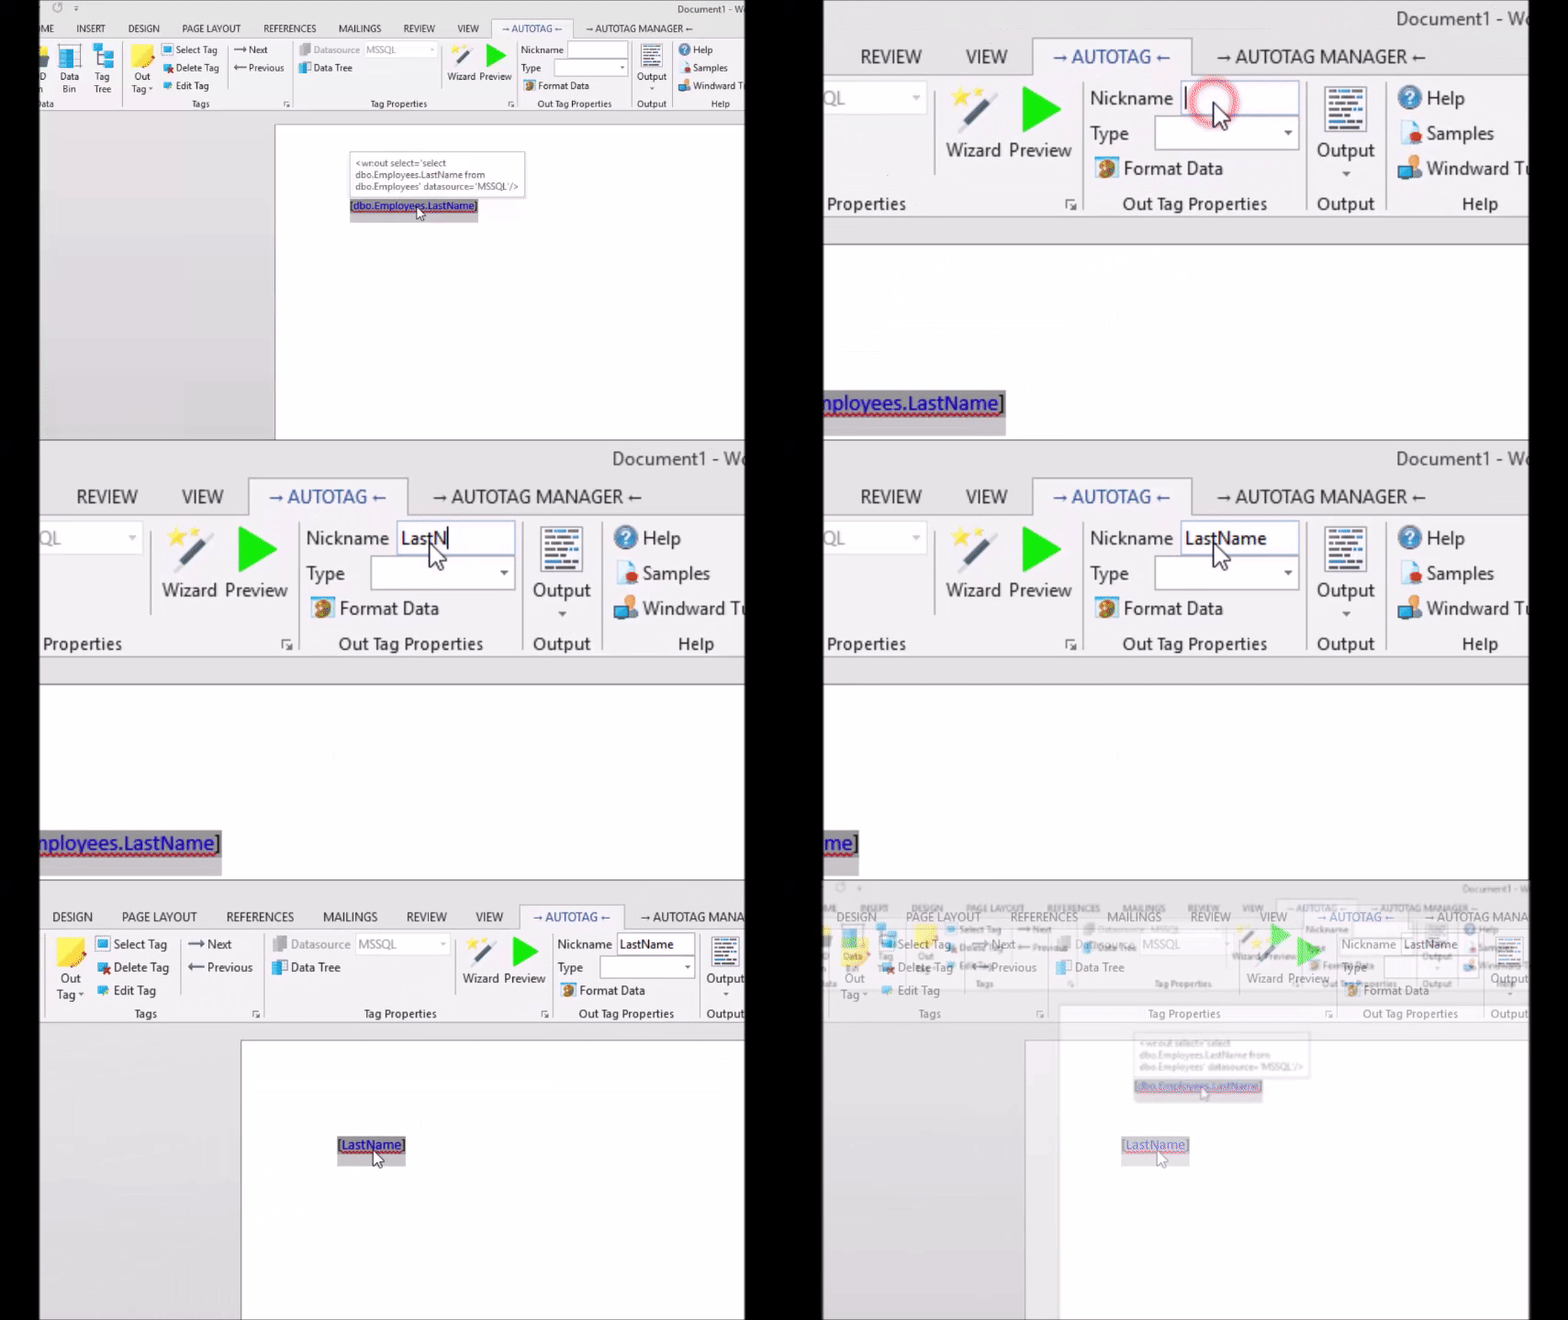
You may want to change what the tag looks like in the template (before the final document is generated). To do this, make sure the tag is selected by clicking on it, then type a value into the "Nickname" field on the right side of the AutoTag ribbon.
6. Evaluate the Tag
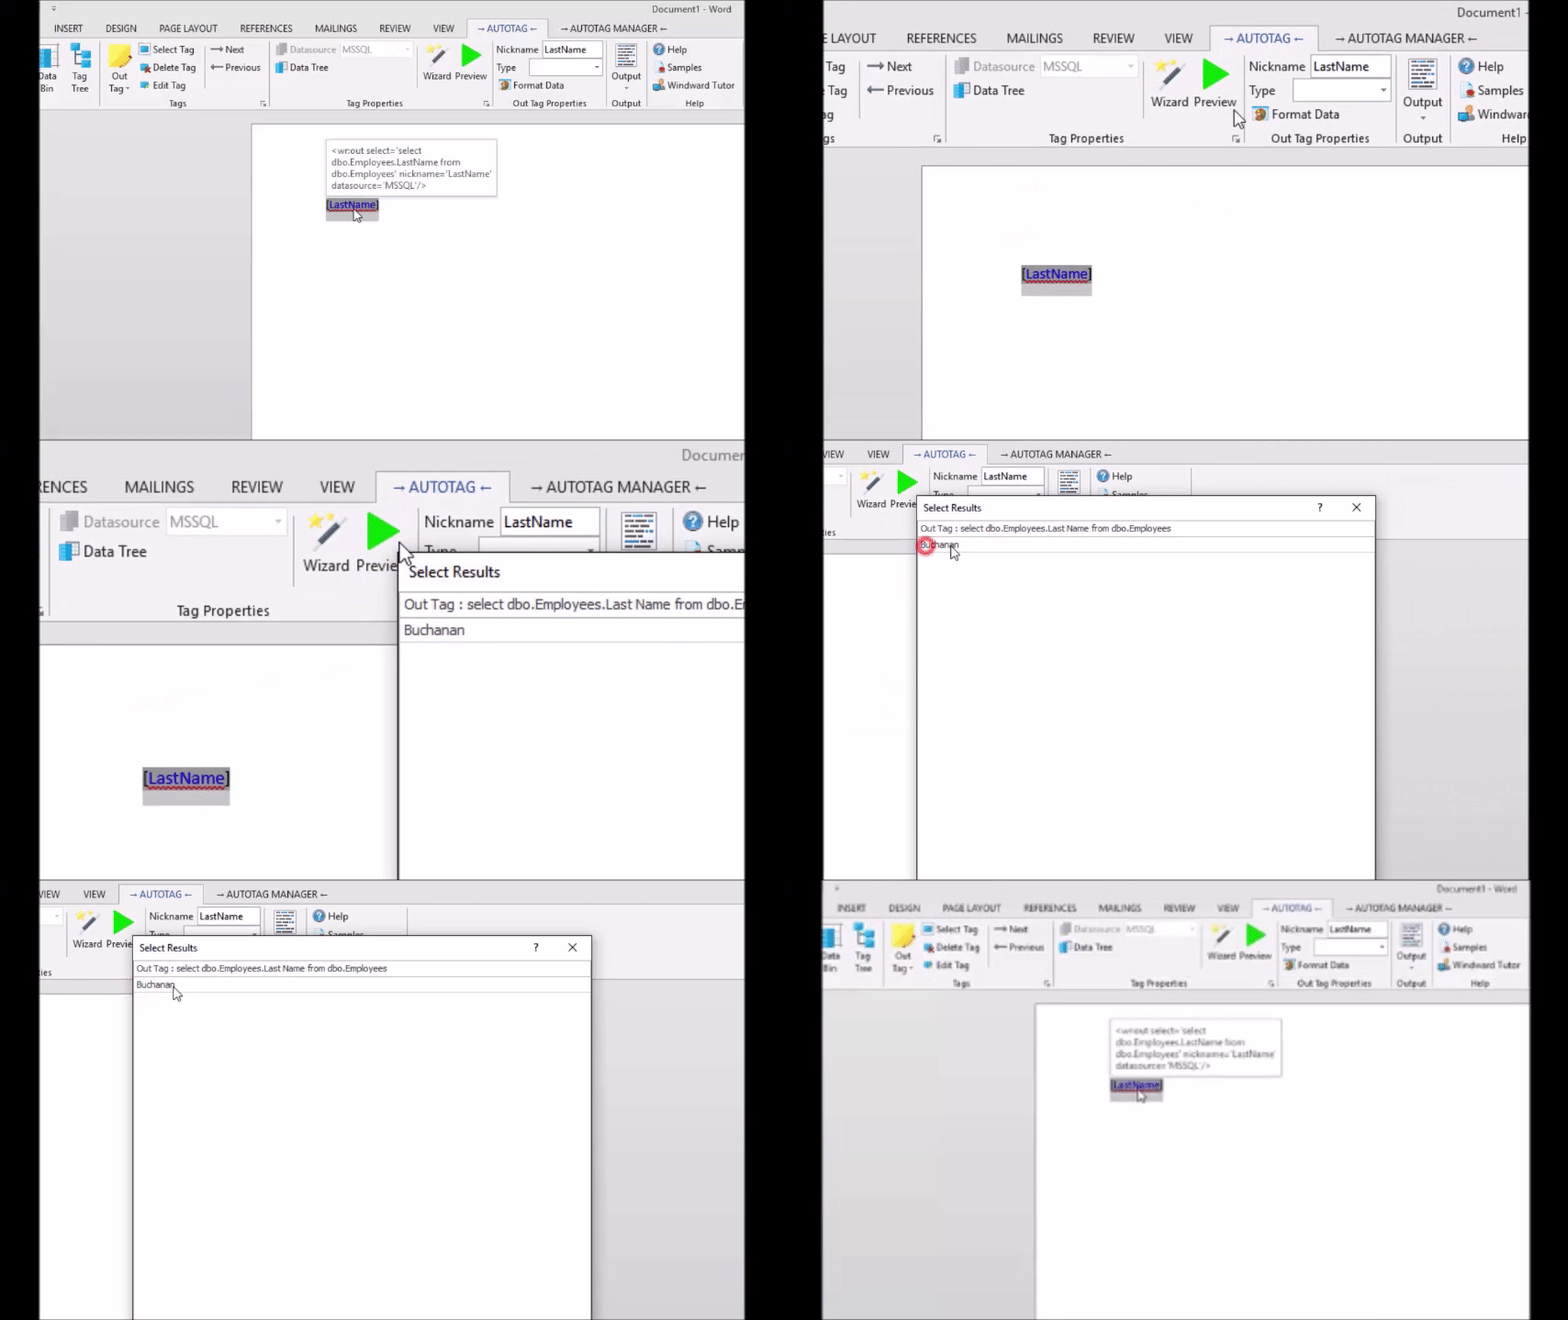
Finally, you can "Evaluate" the tag to see what the results will look like. For out tags, this displays what the out tag will display. The Evaluate results will look different for other tag types. Make sure the tag is selected and click the "Evaluate" button towards the right side of the AutoTag ribbon. It has a green play button on it.
