Objective
To conditionally insert data or other content in an AutoTag document
Background Information
You might want to use an If/Else/End If tag set to display data based on certain conditions. One example is that you want a list of customers that live in Colorado. Another could be displaying a ZIP code only if the country is specified as United States. Or, like we will show you in this tutorial, you can generate a list of items that need to be restocked.
Pre-requisites
Inserting a Tag, ForEach TagStarting Template
We'll start with a ForEach table similar to the one set up in the ForEach tag tutorial. It needs to be connected to the MSSQL sample database.
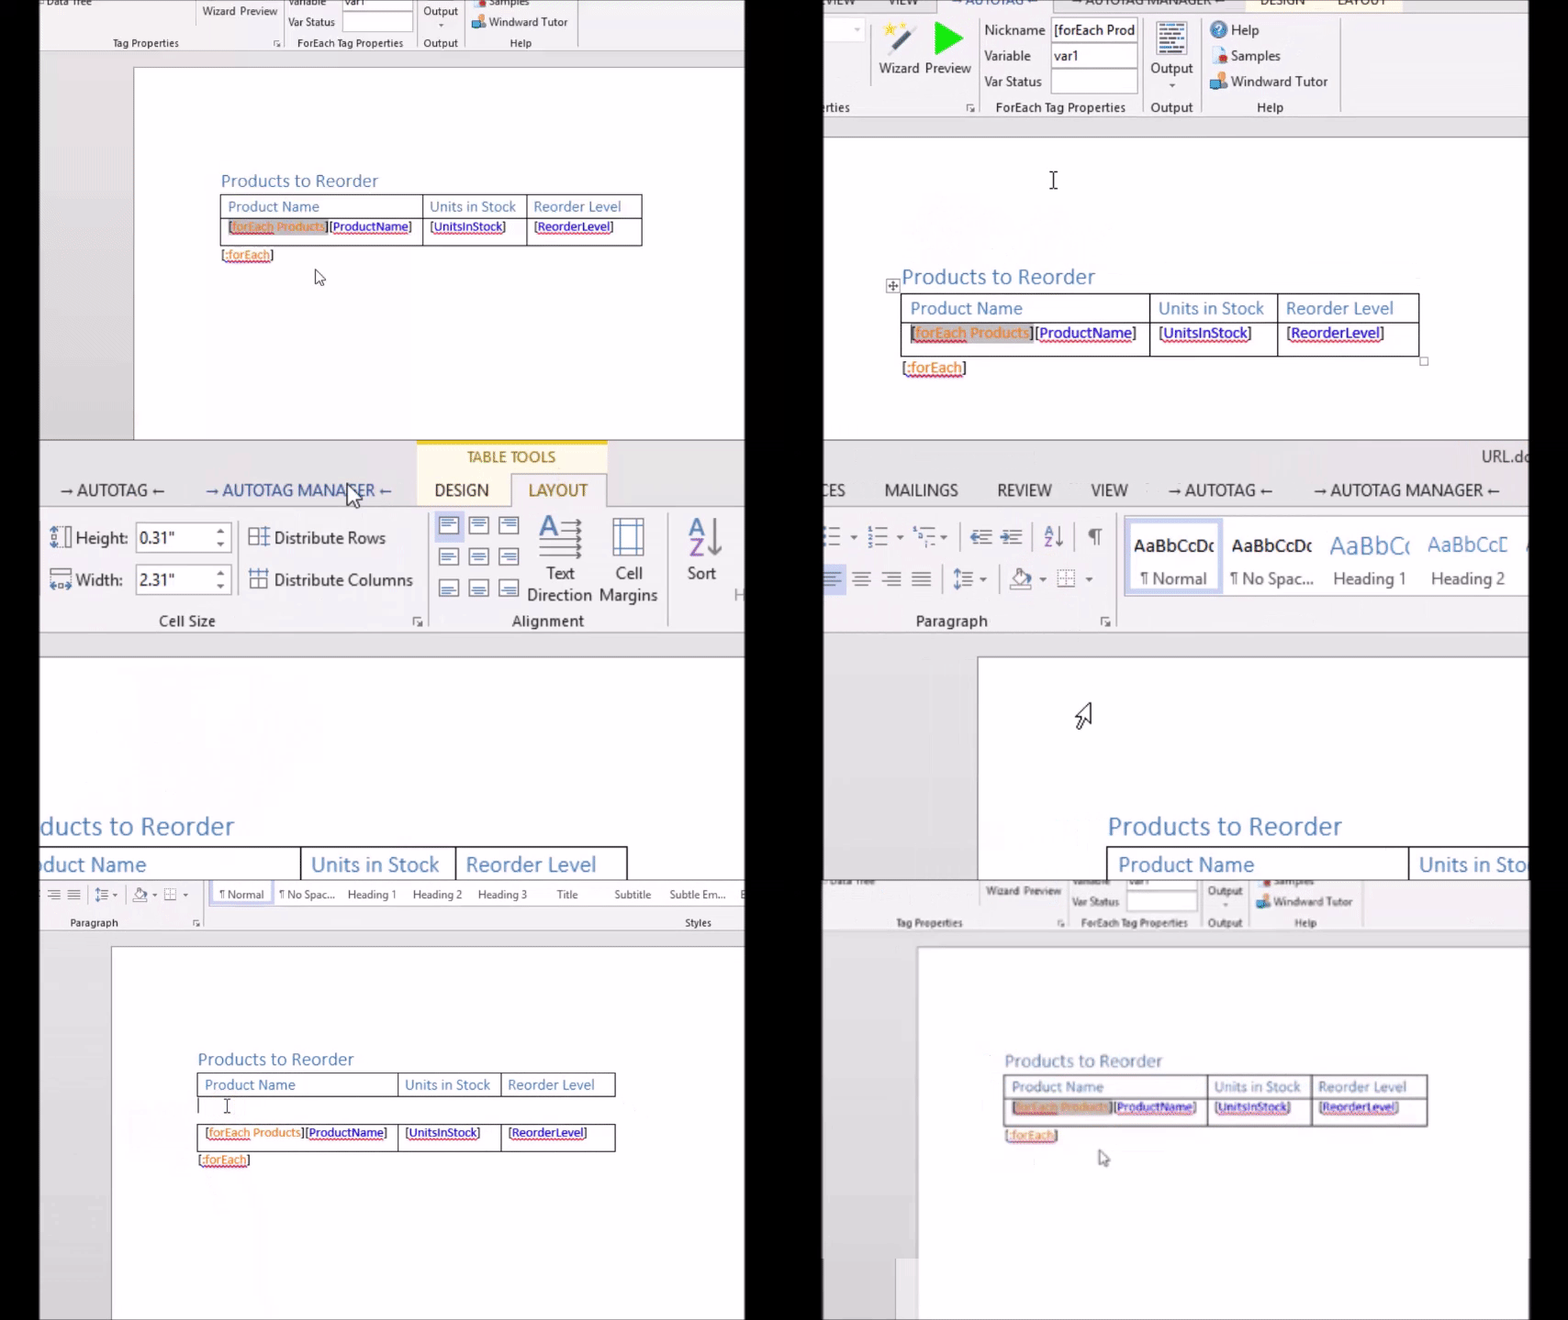
Set up the ForEach tag by making a 3X2 table, naming the columns in the first row, and placing the ForEach tag and out tags in the second row. We selected the Products table for the ForEach tag, and then selected the ProductName, UnitsInStock, and ReorderLevel columns for the Out tags as shown in the picture.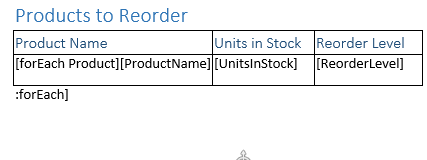
Procedure
1. Split the Table
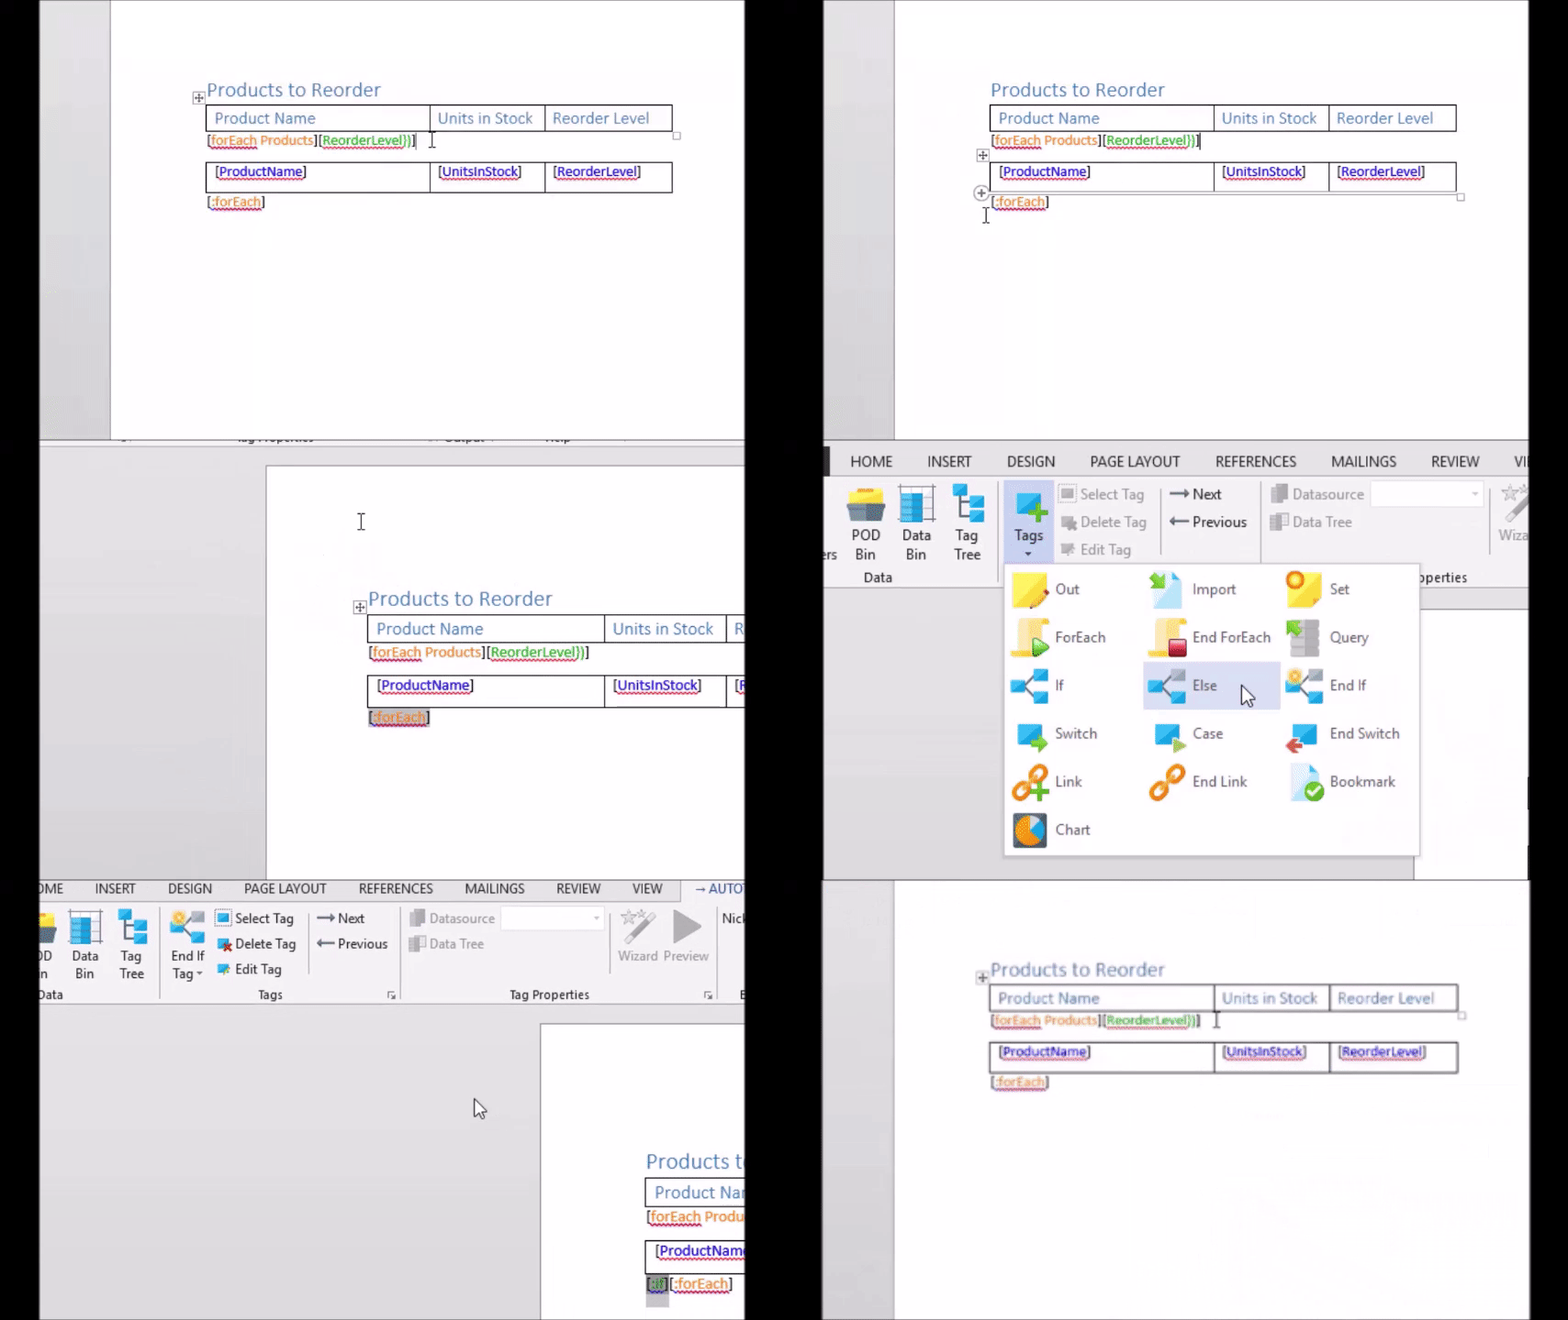
In order to conditionally add rows, we need to split the table so that the column headers always display. Do this by clicking at the beginning of the second row, and then clicking "Split Table" in the Layout ribbon.
2. Move the ForEach tag
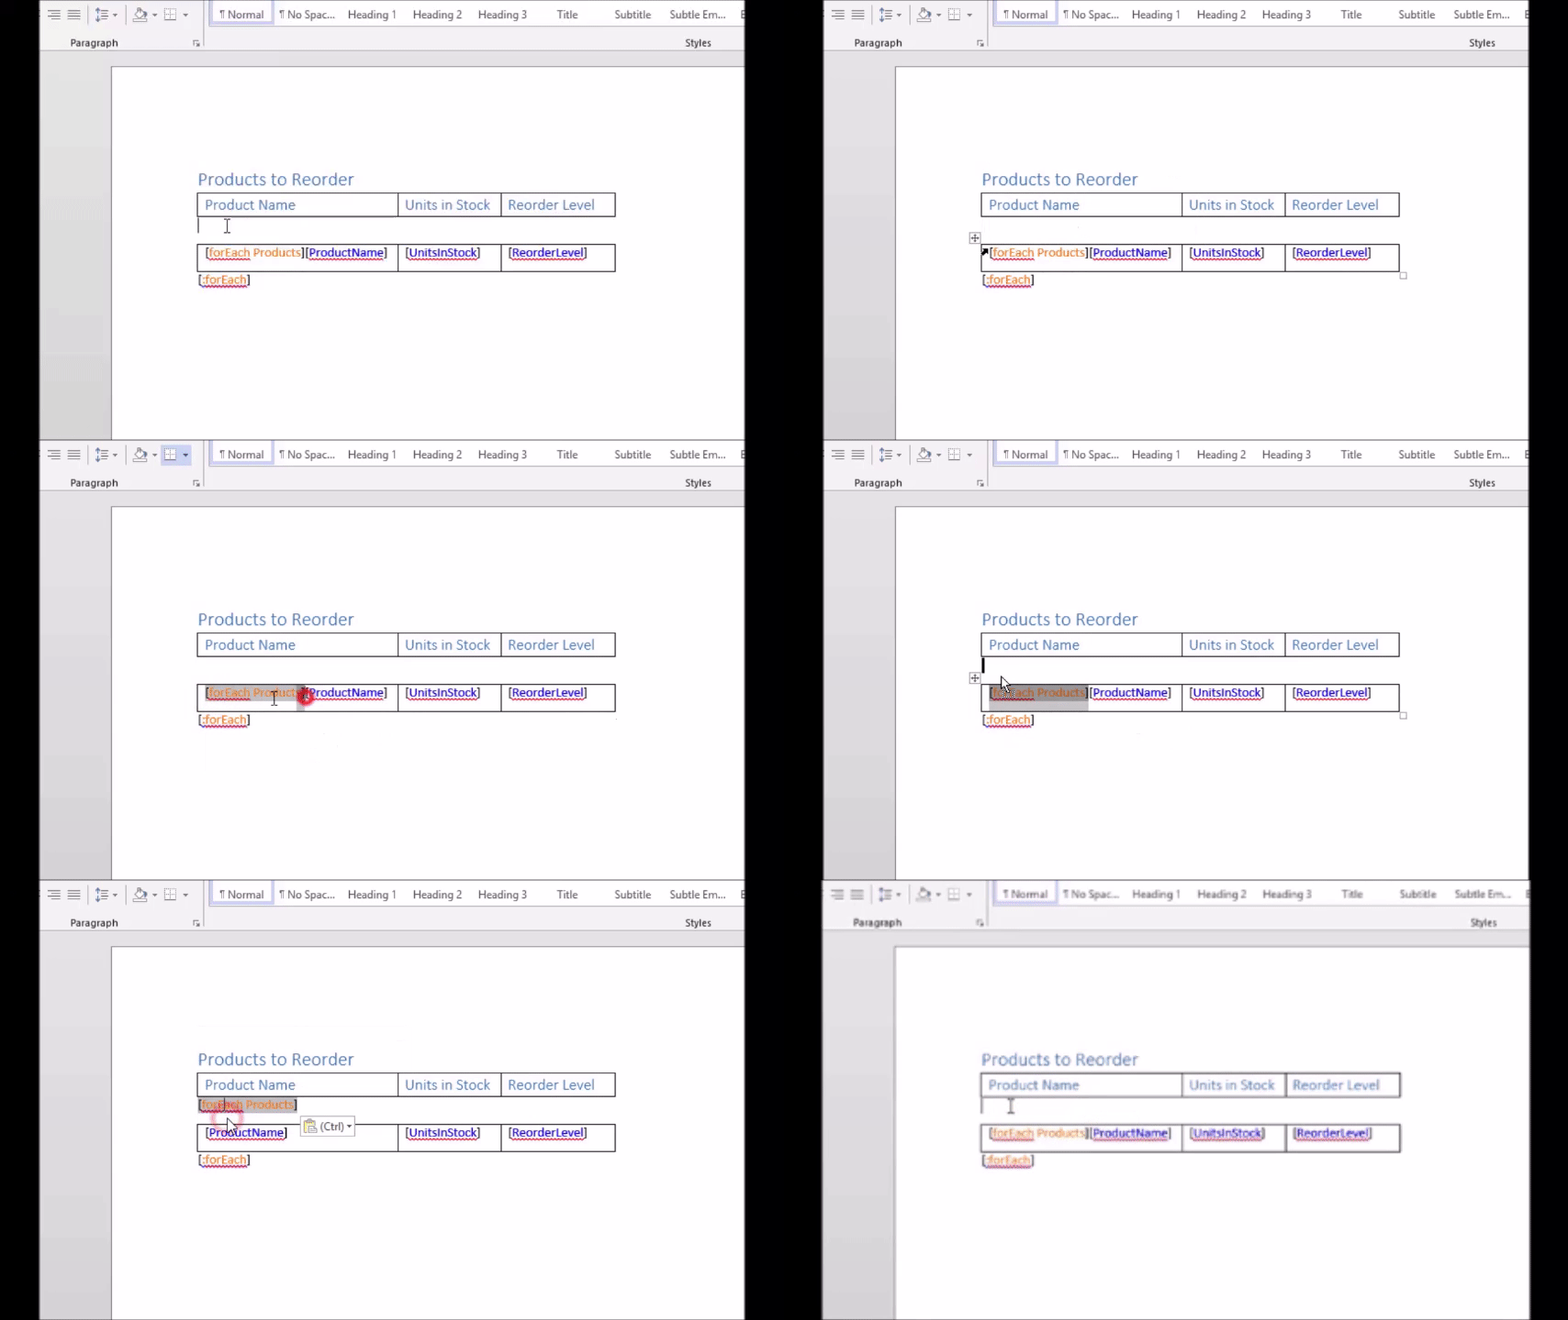
Now we need to move the ForEach tag outside of the table. You can do so by dragging it, or any other method you know. If the ForEach tag is on its own line, or paired with an If tag, that line will not be displayed which is to our advantage, because now we can wrap a row with an If tag to conditionally display that row.
3. Add an "If" Tag
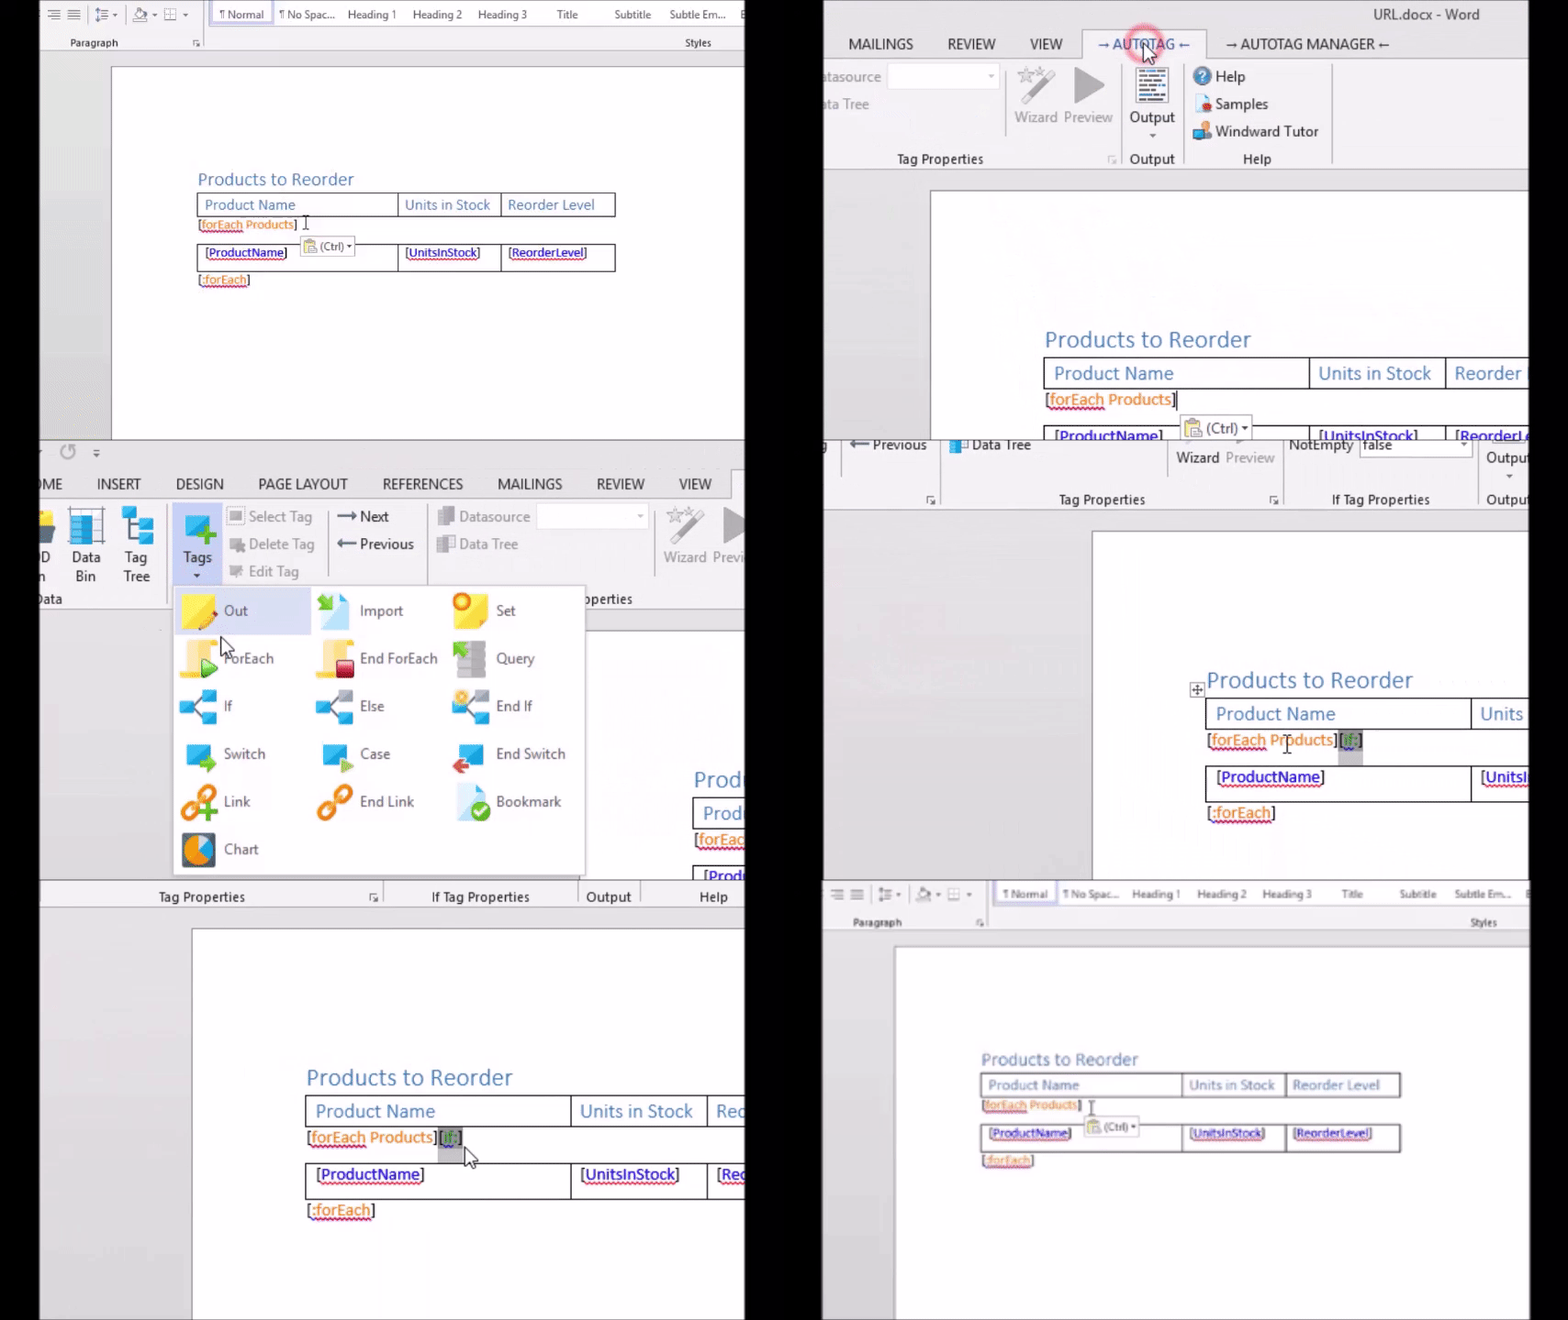
We can add an "If" tag now. We want to put the If tag before the row, but after the ForEach tag. Then it is equivalent to saying "For each row of data, if some condition is true display this."
4. Specify the Condition for the If Tag.
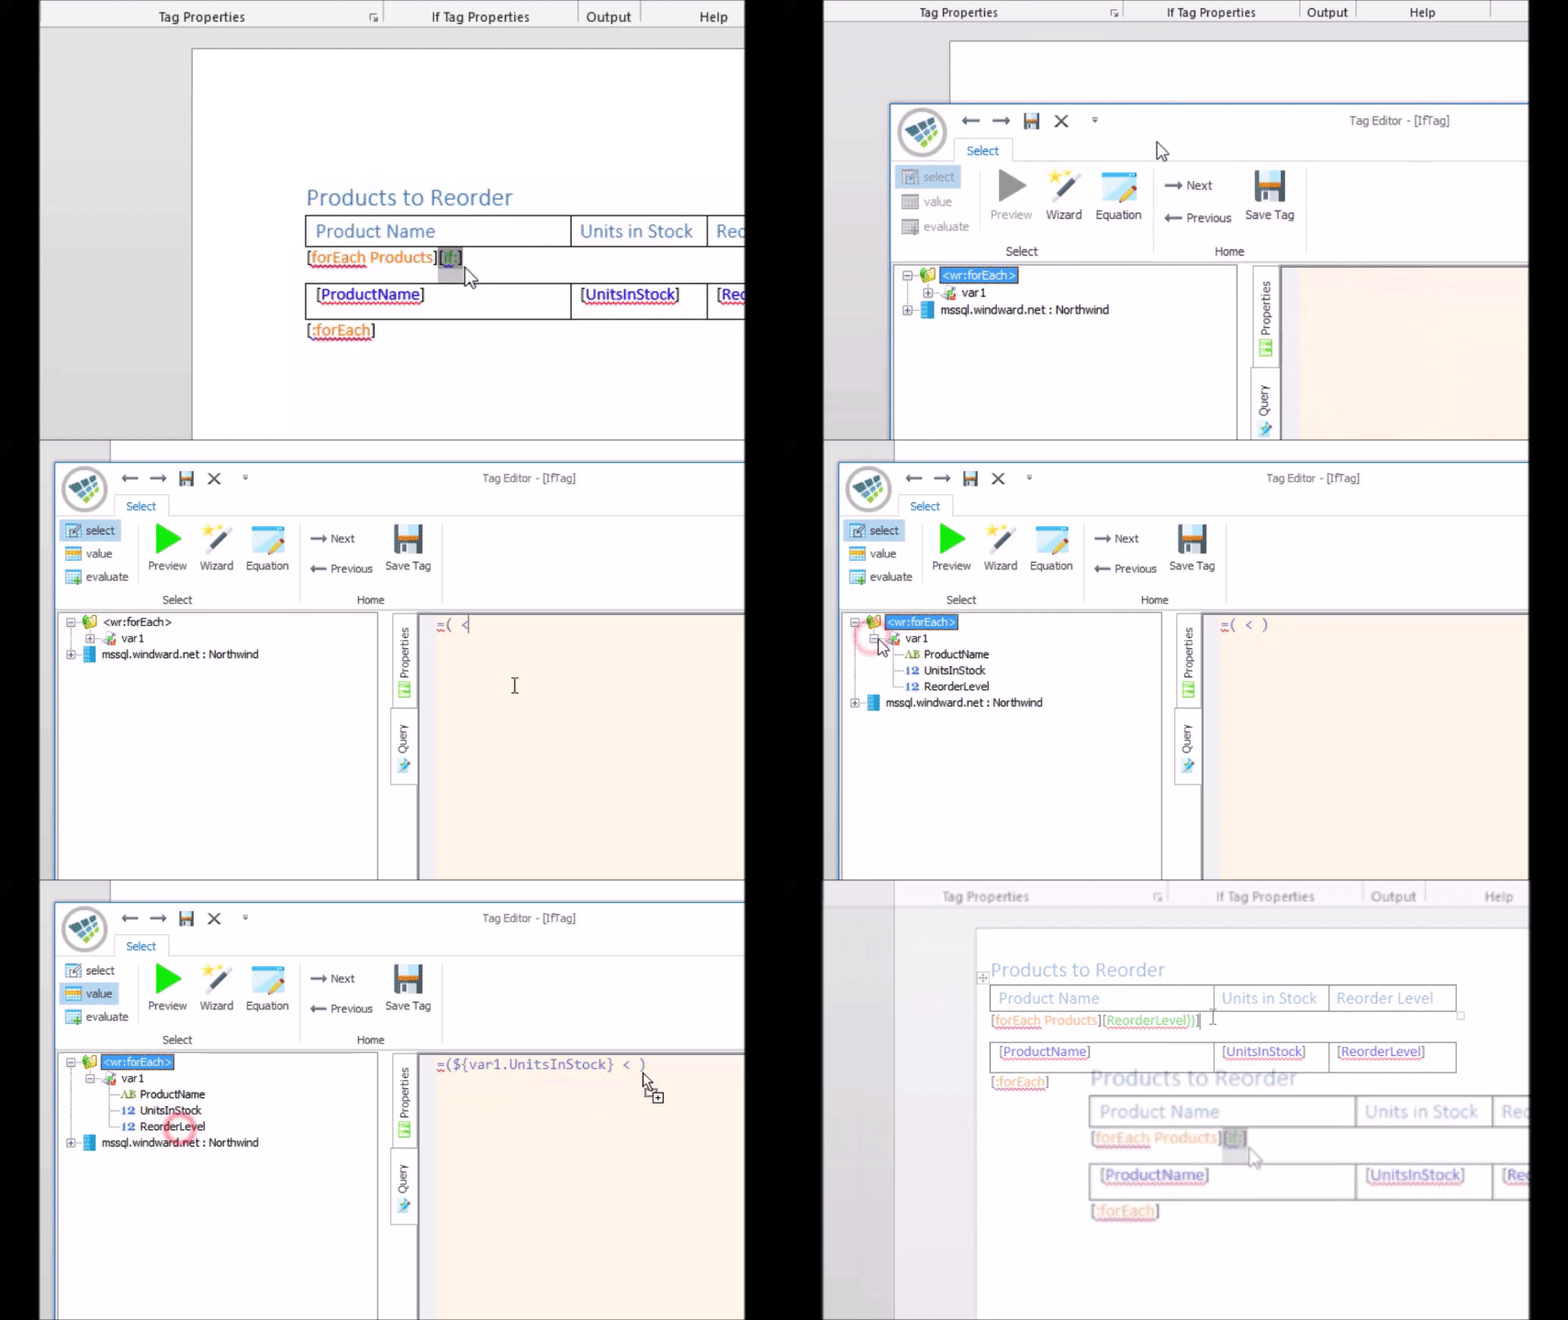
To specify the condition that the If tag evaluates, we need to fill in the "evaluate" field. There are two ways of doing this: One is simply typing an equation in the evaluate field above the "Data tree" button. The other is using the Tag editor. The tag editor allows us to easily drag and drop tables and columns into a box where the equation to evaluate will be constructed.
For this step, open the tag editor by pressing the pop-out button on the bottom of the "Tags" section of the AutoTag ribbon (the Tags section is where you select what kind of tag you would like to insert). Once in the tag editor, type the following equation: =( < ). This signifies that we will be doing an evaluation (=) of whether one data item is less than ( < ) another. From the data bin on the left side of the window, we will drag the two columns we want to compare to either side of the less-than sign. Drag the UnitsInStock and ReorderLevel columns respectively to compare if the current stock is less than the re-order level.
5. Insert EndIf Tag
The EndIf tag marks the end of what is displayed conditionally, so add it after the data row but before the End ForEach tag.
Note: You could optionally choose what to do in case the condition evaluated is false by placing an Else tag here instead, and anything you would like to display in the case of false evaluation between the Else and EndIf tags.
6. Generate and View the Results
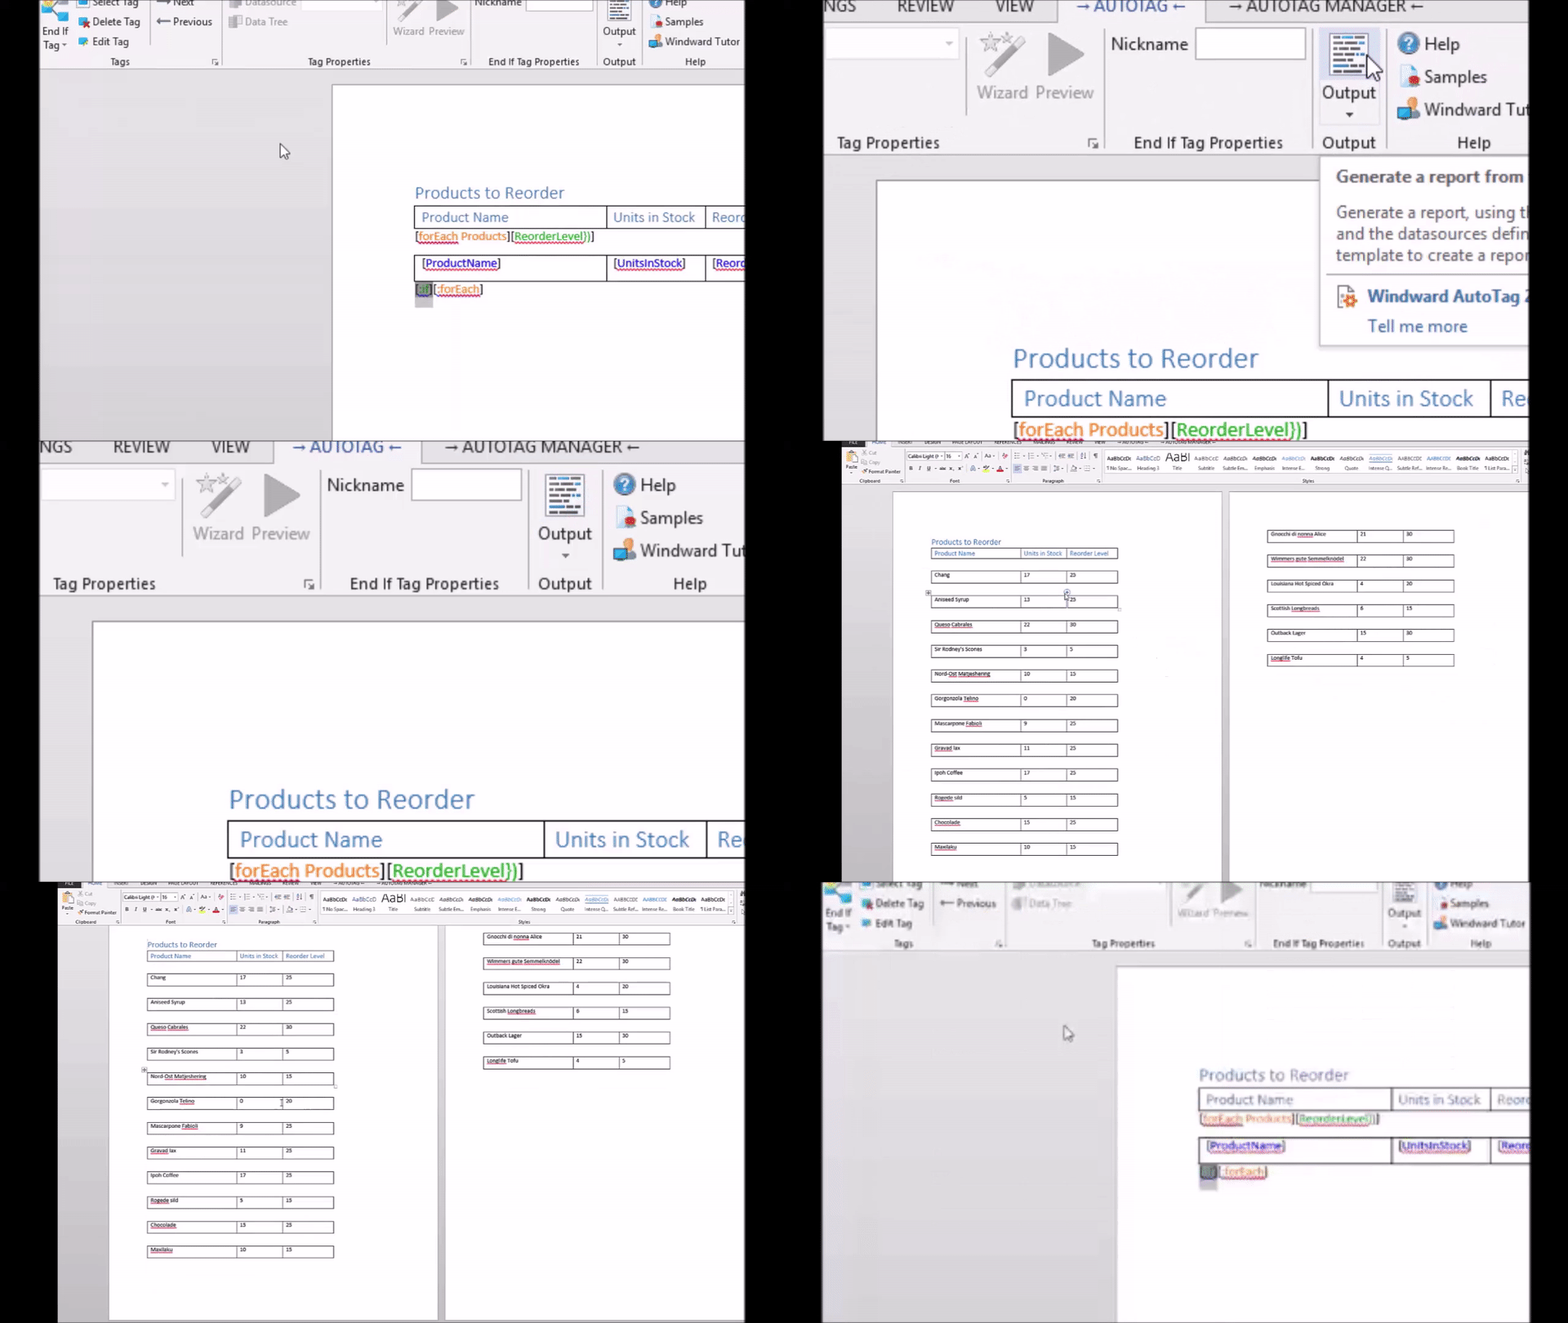
In the AutoTag ribbon, click Output and then DOCX to generate the output. Check out the results!
