Objective
To filter data based on a single, static criteria through the creation of a simple document which displays a list of discontinued products.
Background Information
Suppose you are required to create a document which lists all of your companies discontinued products so that you can clear out the inventory. AutoTag and the SQL Wizard allow you to do just that by creating a filter to find all discontinued products. Here, we won’t show you the actual template creation as you can learn this in several other tutorials such as the ForEach Tag tutorial.
Pre-requisites
Inserting a Tag, ForEach Tag, SQL - Part 1: Basic SelectionStarting Template
Start with SQL Wizard open. To open it, simply select the ForEach tag you are selecting data for (or create one and make sure the document has a SQL datasource, then make sure it’s selected) and click the Wizard button in the AutoTag ribbon, or check out the SQL - Part 1: Basic Selection tutorial.
Procedure
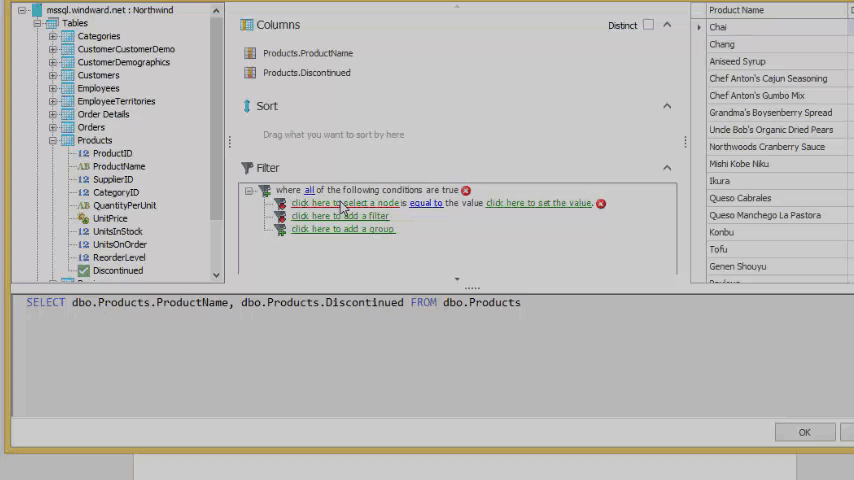
1. Drag ProductName and Discontinued to Columns
First, we need data to be returned, so we’ll start off by adding the ProductName and Discontinued columns from the Products table. Do this by expanding Tables, then Products, and then drag ProductName and Discontinued to the top box in the middle of the window labeled Columns. This is exactly what you did in Part 1.

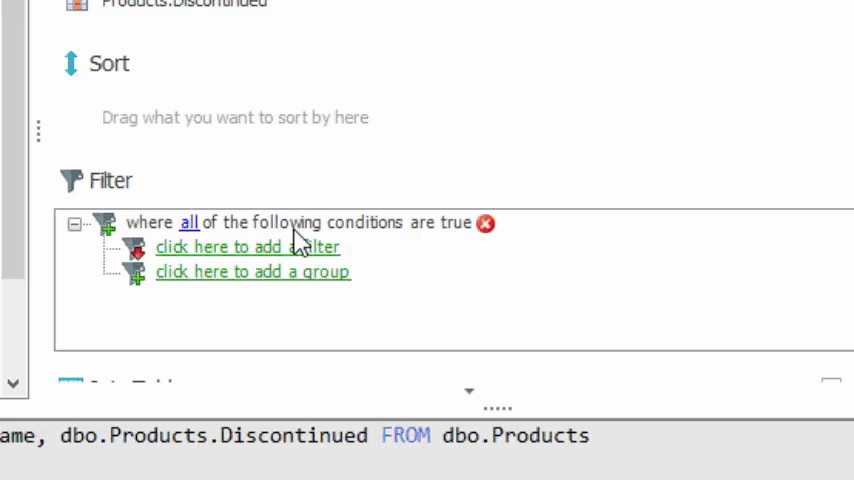
2. Add a filter group, then add a filter
After that, we want to add the filter. In the SQL Wizard, to add filters, you have to click the statement click here to add a group first, then click here to add a filter.
3. Set filter to use Products.Discontinued
Once you have a filter, you simply need to set the properties so the filter knows what it is filtering. Click onclick here to select a node and select the Discontinued column from the Products table.
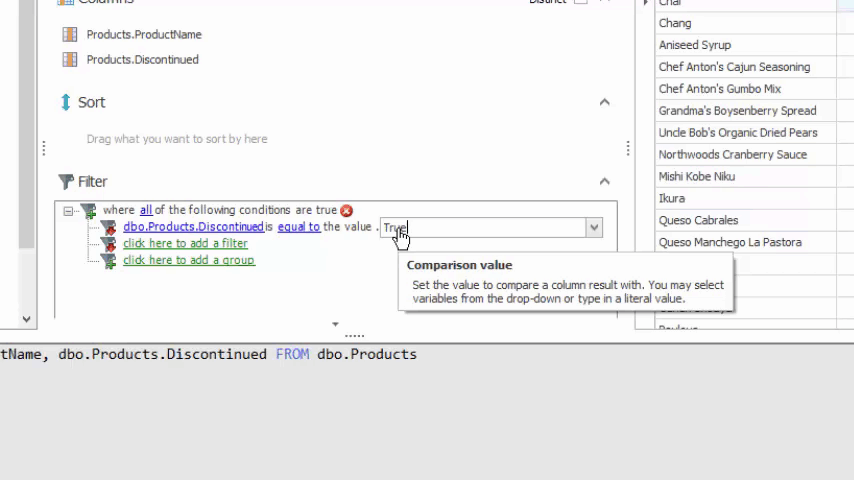
4. Set filter to check for True
Next, click on click here to set the value to set a value to compare Discontinued to. Since we want to see Discontinued products, type True here (with a capital T; SQL Wizard is case sensitive in this case). And that’s it. Creating a filter is that easy!
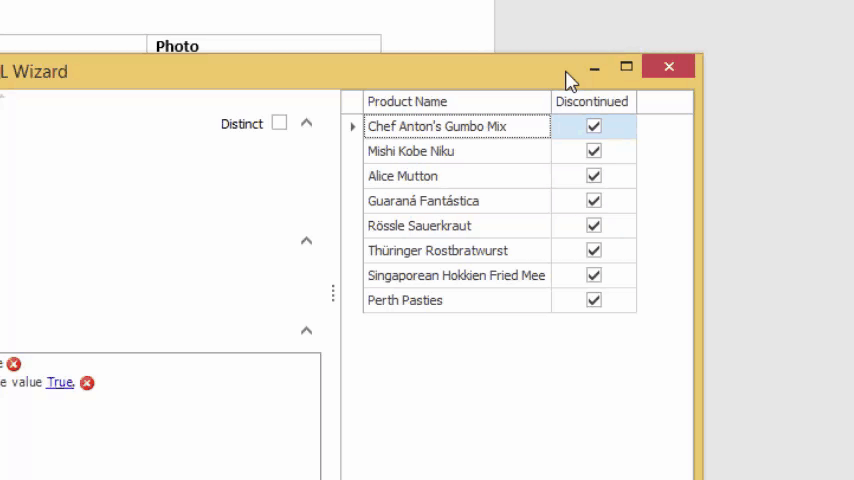
5. View results in right panel
Of course you probably want to see what kind of output is returned when this filter is applied. You may have already noticed, but you can easily see this in the right side of the window.