Objective
To learn about the XPath Wizard for XML data, and replicate the process of creating a ForEach table with a simple selection of 3 columns of data through the creation of an analysis of shipping costs.
Background Information
Today, out of curiosity, we want to see how much money we pay for product shipment, so we want to create a table which contains the Order ID, the Shipper’s ID and the Freight cost. There are a lot of improvements to be made to improve the display of data, but for now, we just want to demonstrate how to select the data with the XPath Wizard.
Pre-requisites
Inserting a Tag, ForEach Tag, Out Tag - Formatting Dates and CurrenciesProcedure
1. Insert SW datasource
Load the SouthWind XML datasource by clicking the bottom half of the “Data Sources” button and selecting SW. If you do not see this menu option, you may select another XML datasource (and the names won’t match up with this tutorial), or follow the instructions in the Connecting to your XML data tutorial using the same datasource information to fill in the boxes.
2. Insert a table with 3 named columns
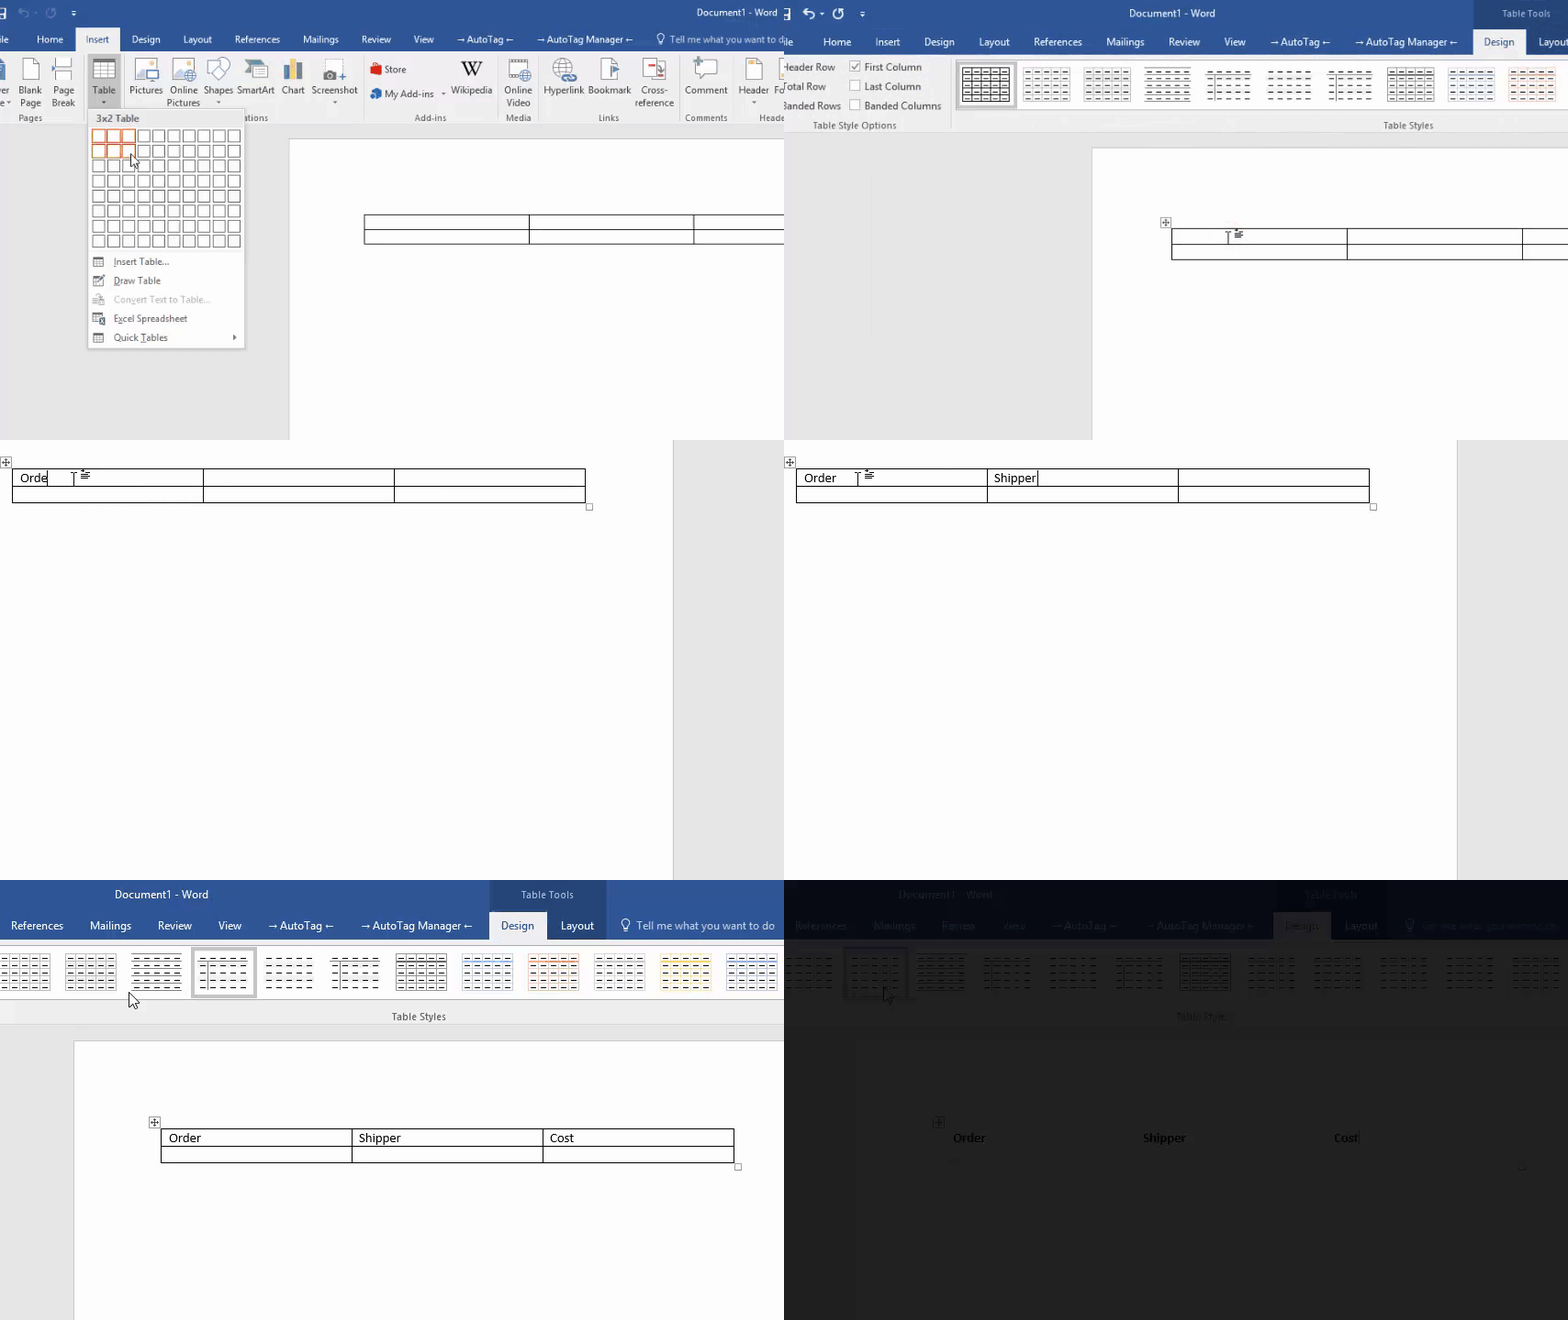
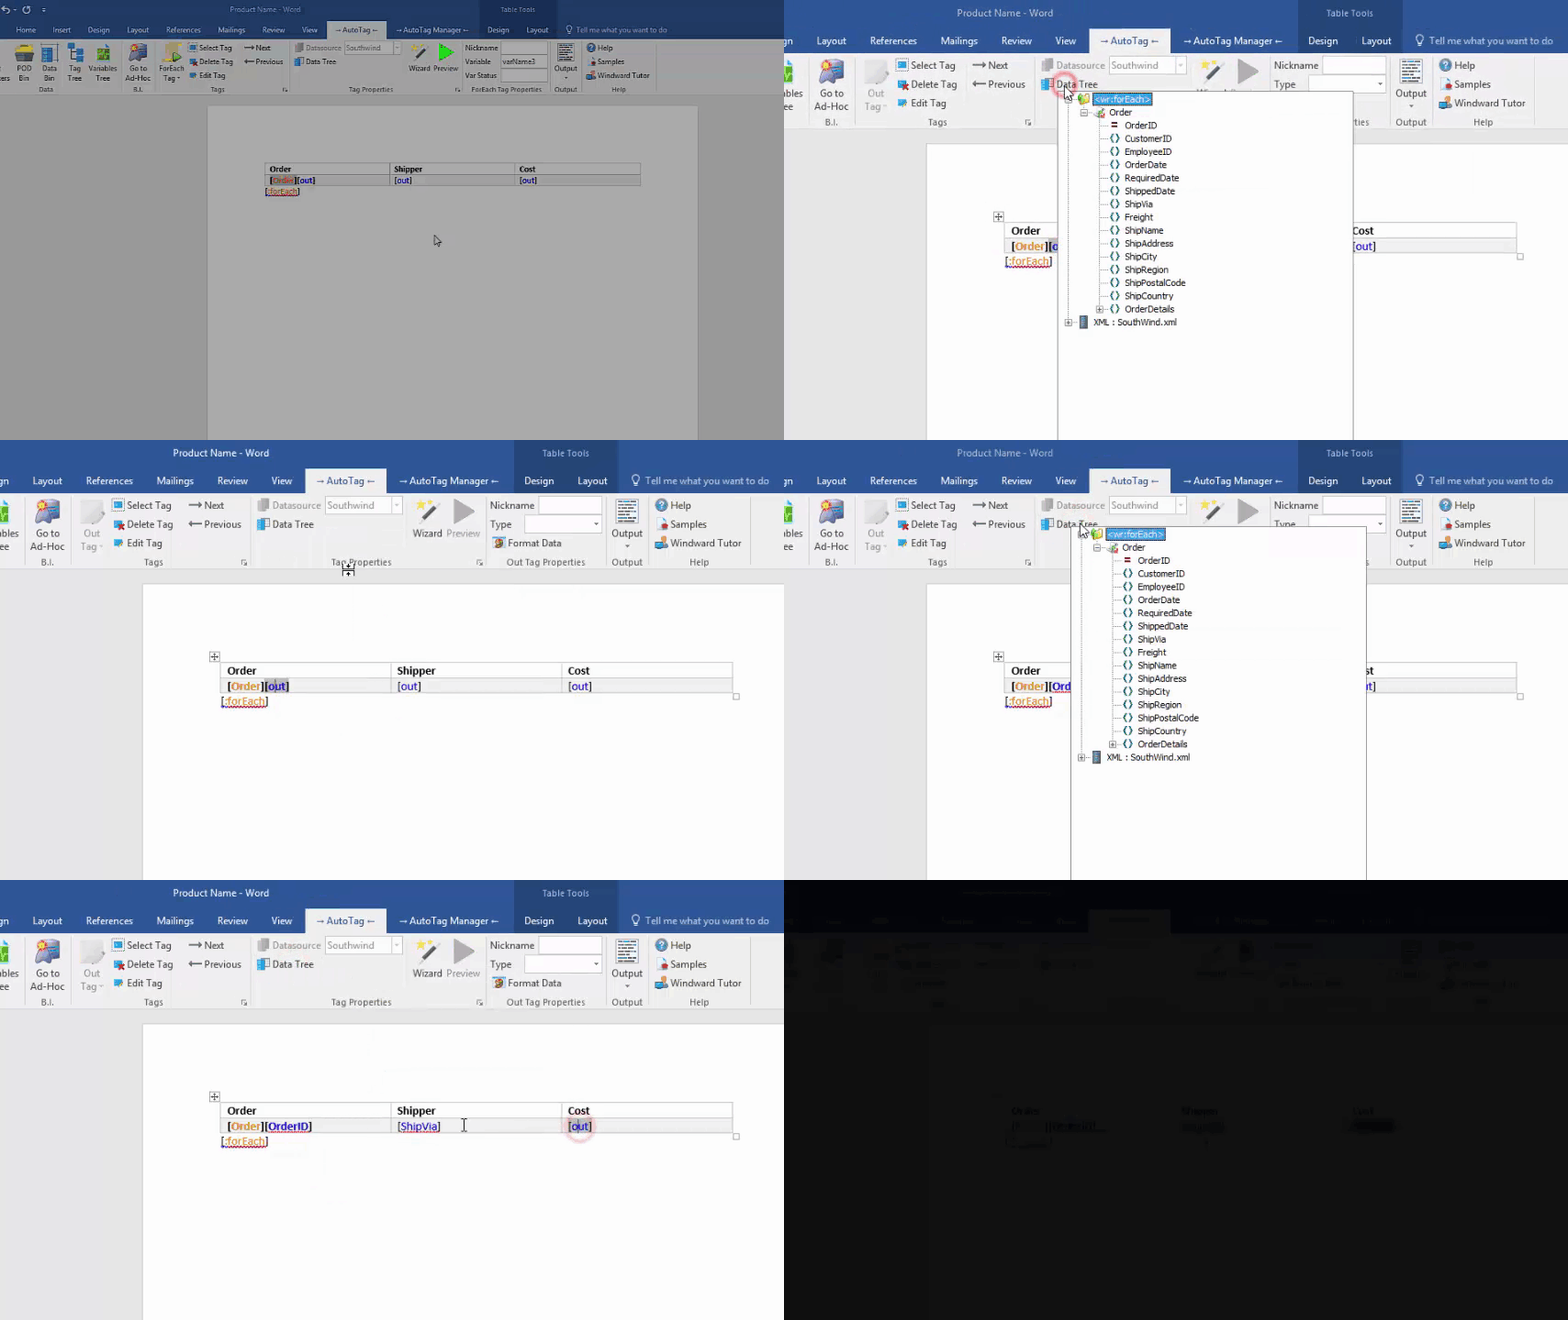
Open the Insert menu in Word, and click the Table button to insert a table. Select a 3X2 table. In the interest of spicing this design up in the simplest way possible, we’re going to select a table style from the menu that shows up (if you lose it, it’s one of the highlighted Table Tools ribbons, called Design) The styles are right in the center of the ribbon. We chose the third one called Plain Table 1. We’ll also name the columns here as follows: Order , Shipper, and Cost.
3. Insert tags for a ForEach table
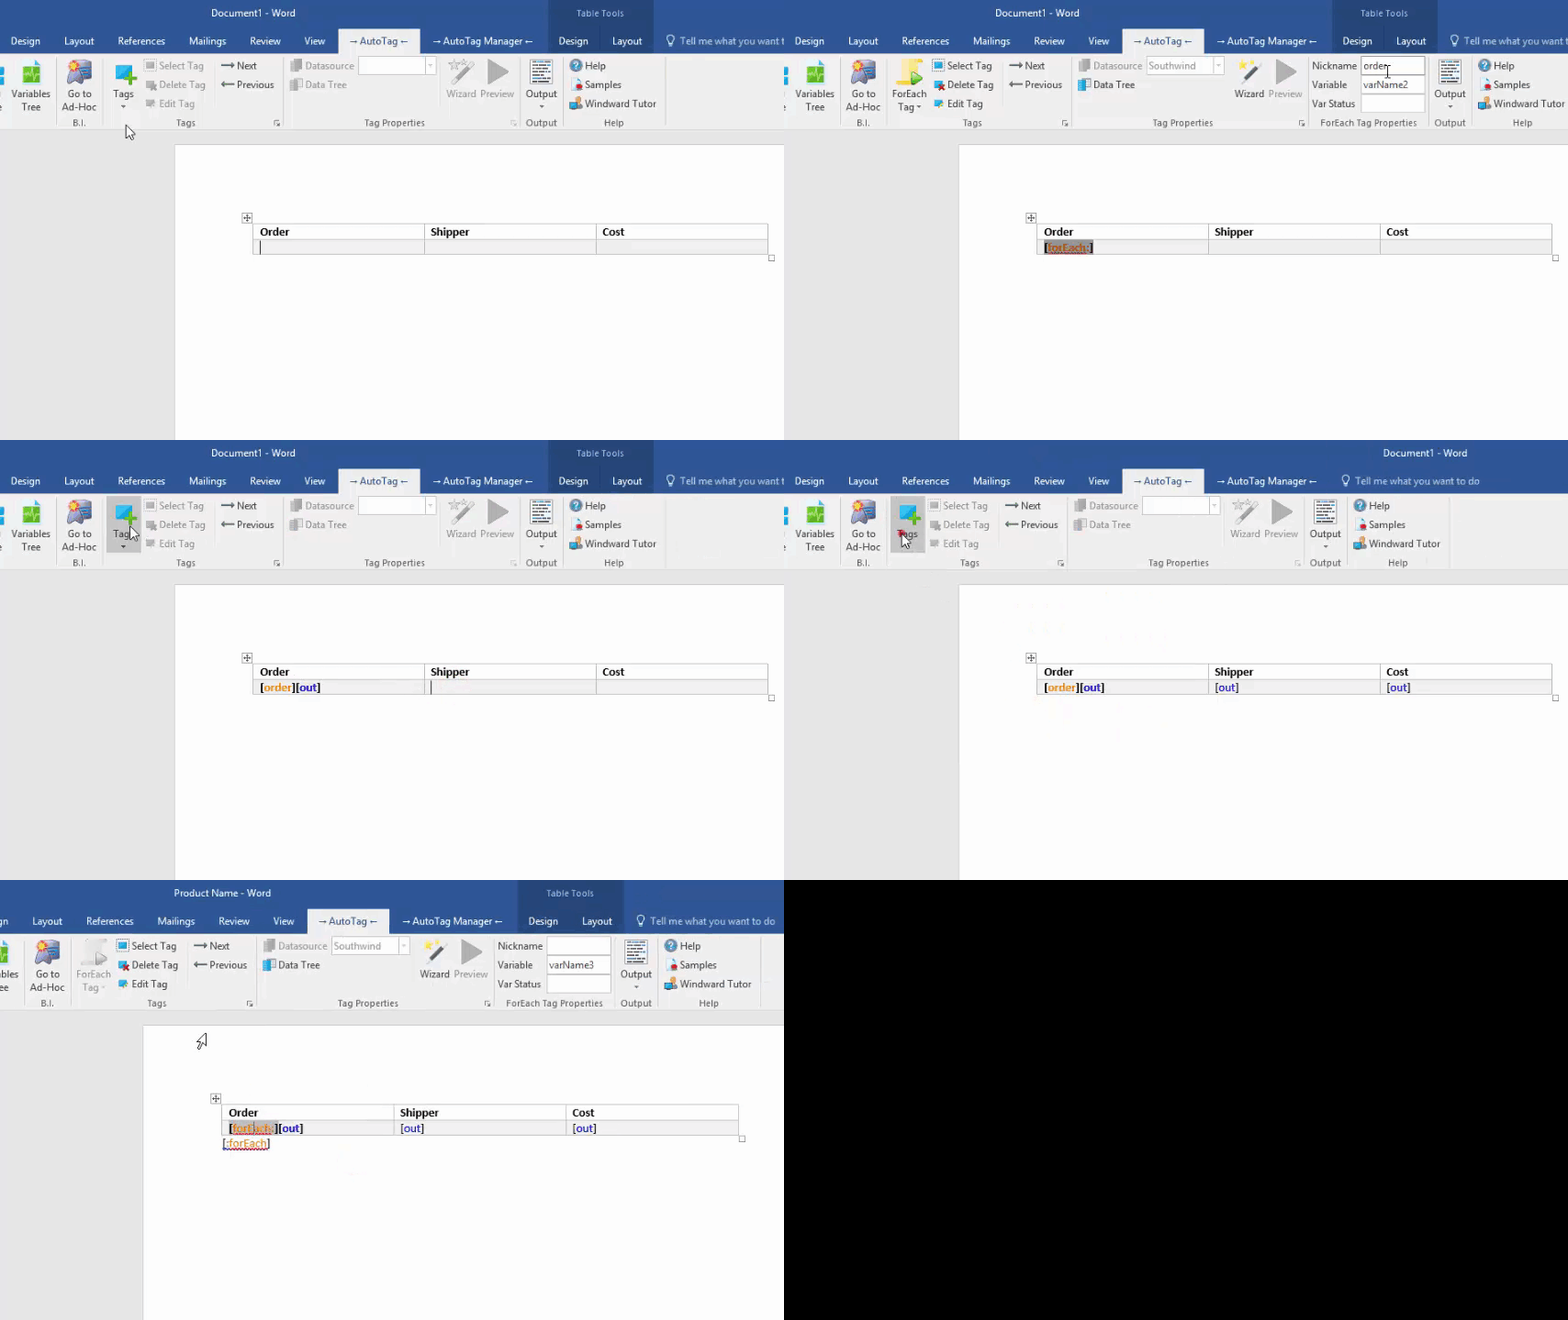
As you have done for previous tutorials, we’ll insert a ForEach tag. Open the AutoTag ribbon, find theTags button and select the ForEach tag. We’ll give it the nickname[forEach order: and name the variable order. Also insert 3 out tags and an End ForEach tag using the same device.
4. Open the XPath Wizard
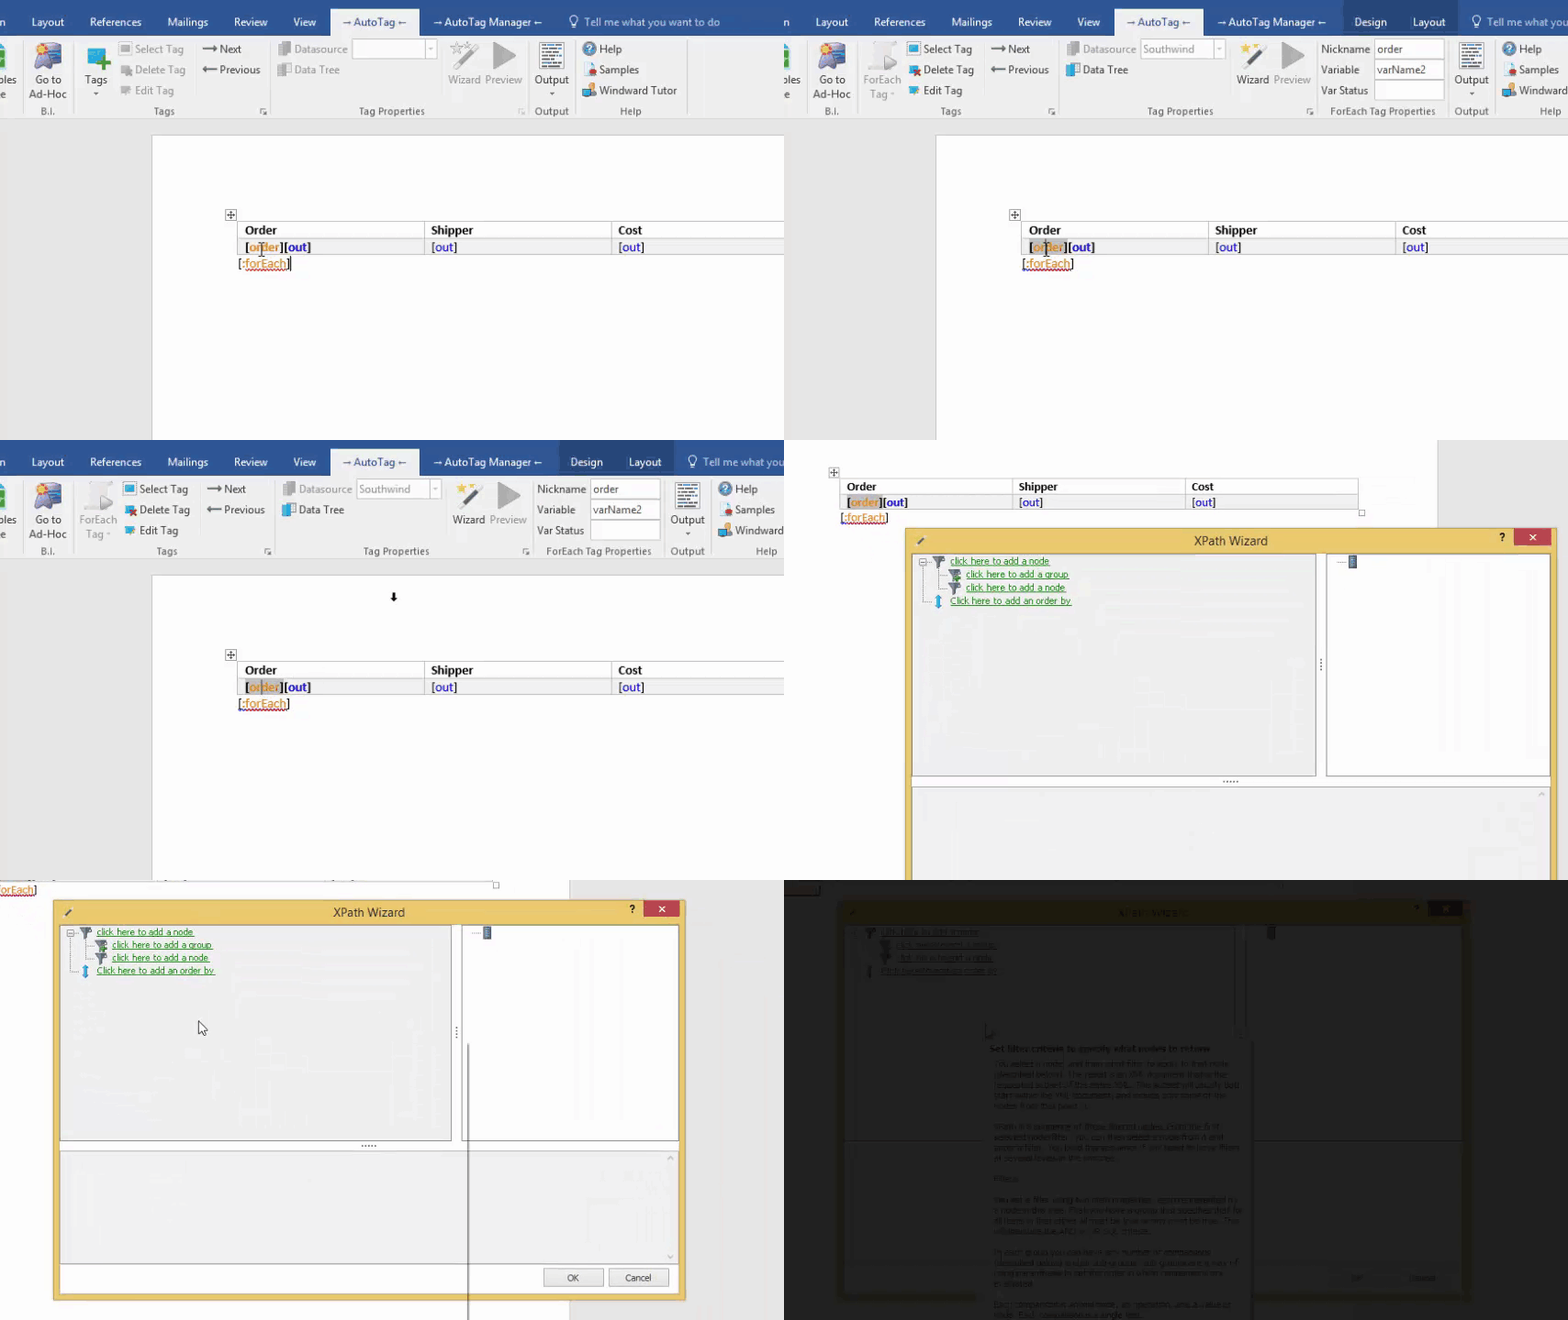
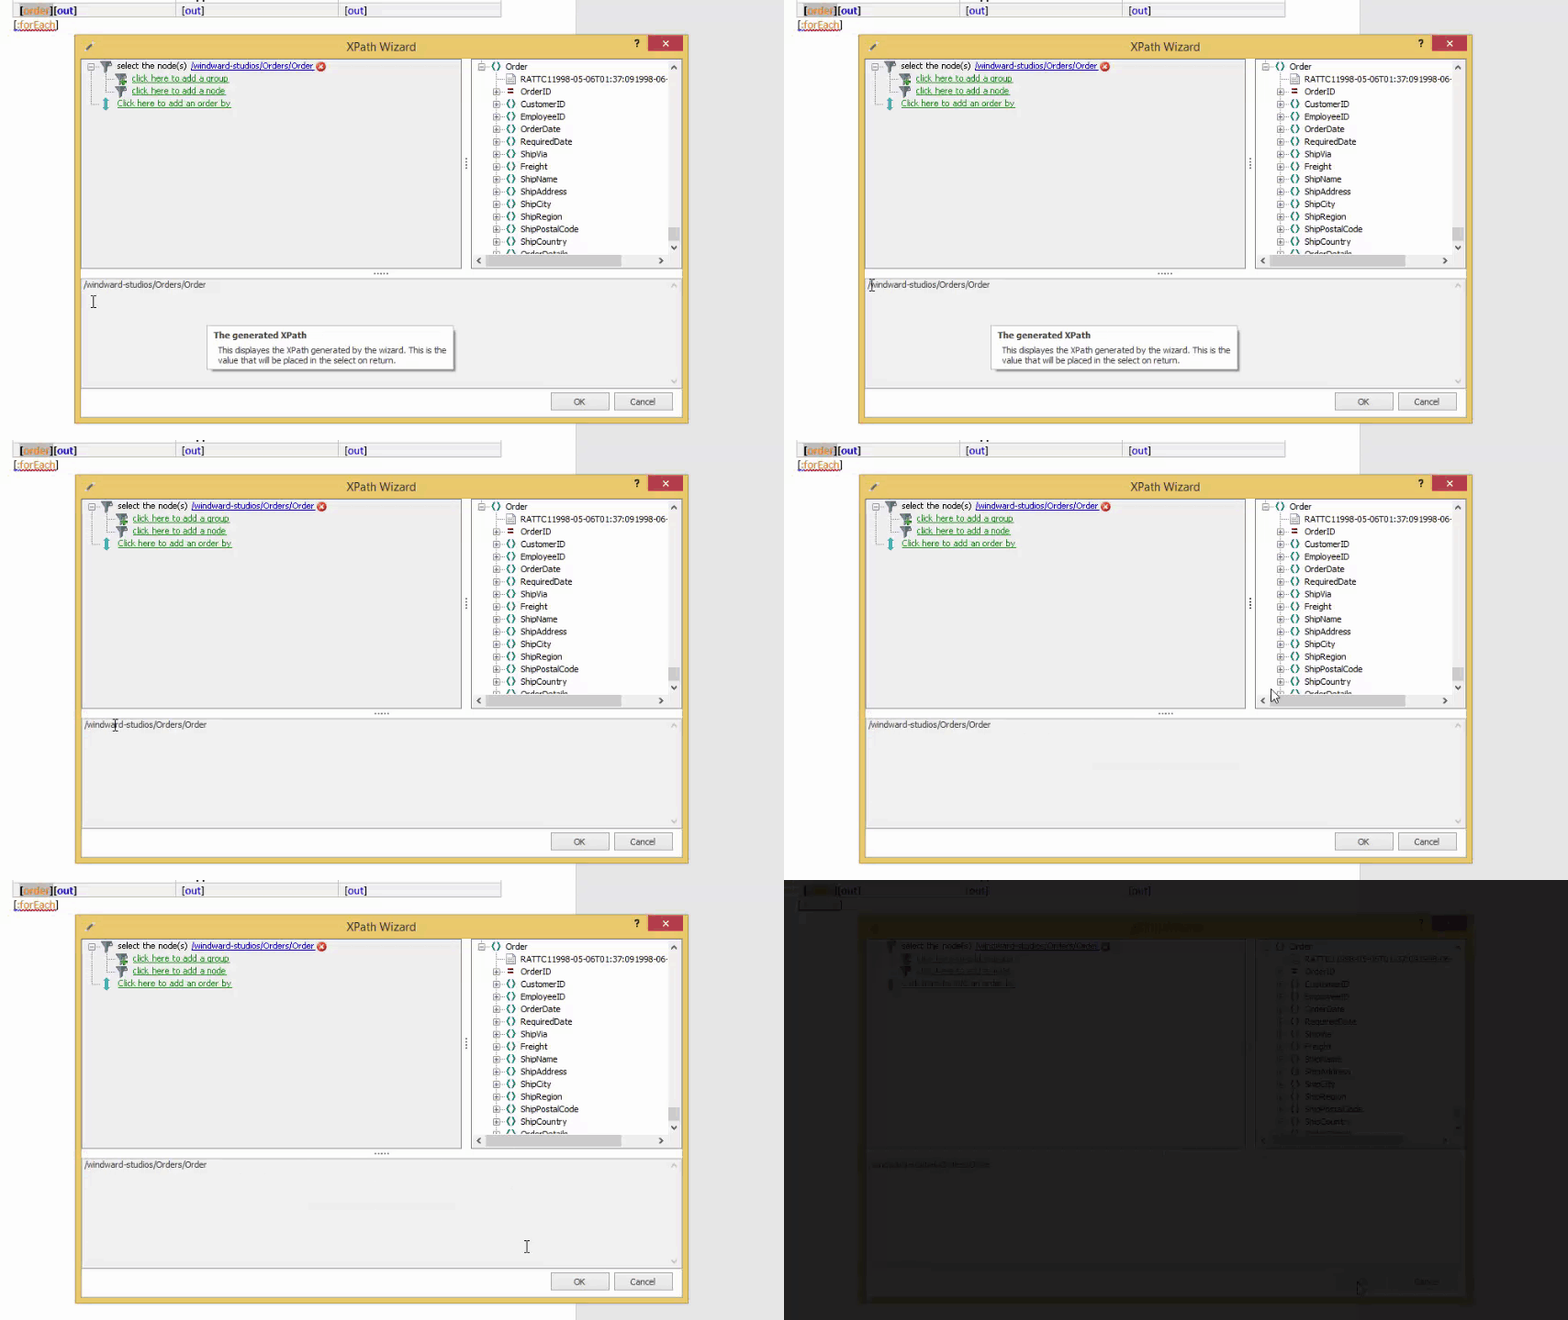
To do this, select the ForEach tag you just created, and under the AutoTag ribbon, click the Wizard button. This opens up a window called the XPath Wizard. XPath is simply a description language for XML. It allows us to specify what data we want to retrieve from an XML datasource. The XPath Wizard, therefore, assists in constructing XPath statements to retrieve the data you need. In step 6, we’ll explain everything in this window.
5. Click to add node
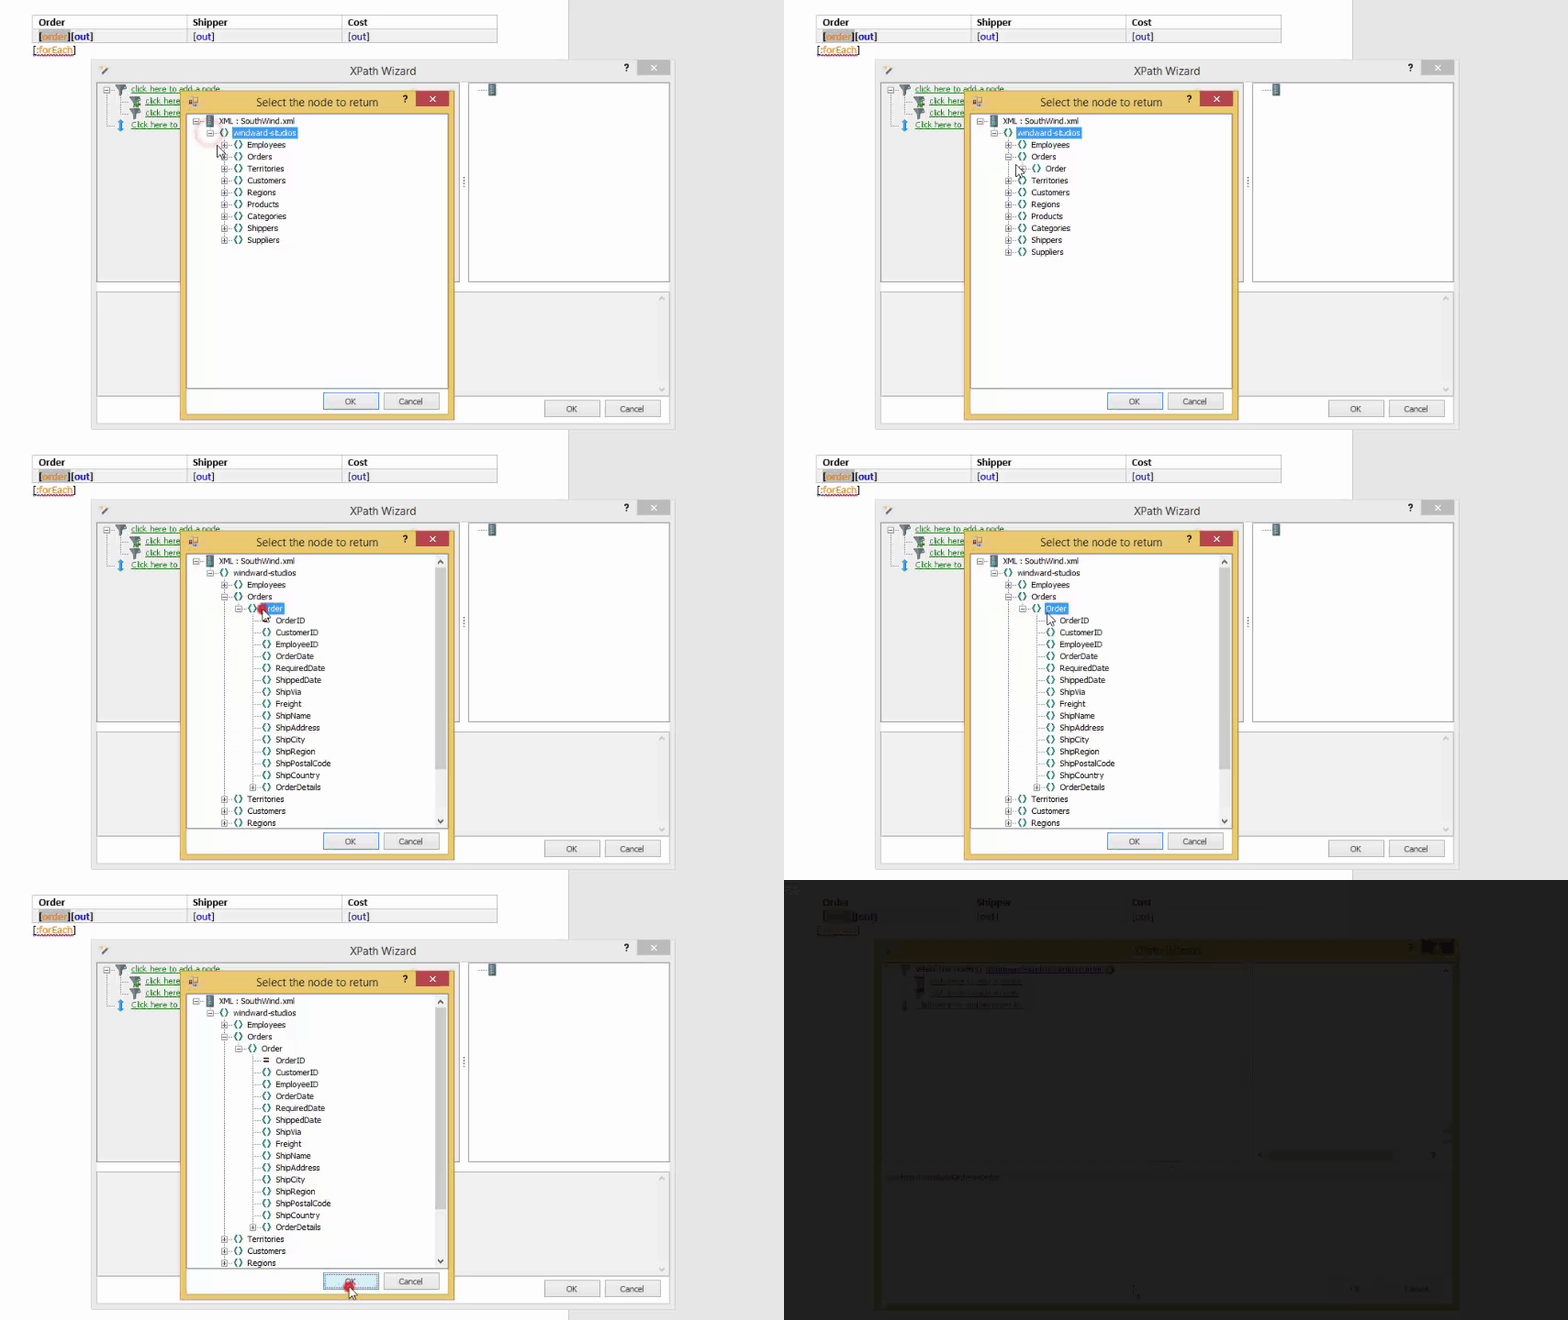
In the left panel, there is a box with a tree structure in it, and several clickable links in that tree. This is where you select the data you want. In XML, a grouping of rows and columns of data is a node, so click to add a node which will open up a window showing a tree of your data. Select the parent of a tree which contains data elements. In our example, we selected windward-studios/Orders/Order because in this datasource, there are several Order’s in Orders
6. Inspect window
In this window, you can not only select simple sets of data as we have just done, but you can also specify conditions to sort and filter that data, and in the cases of sub-sets of data (see XPath – Part 6: Selecting Sub-Nodes) you can also create advanced filtering schemes based on several layers of data. When you are done checking out the interface, close the XPath Wizard to return to Word.
7. Select data for out tags
Once again, this is something you have done before, so hopefully you have lots of practice with it. You need to select data for the out tags from the Data tree.
8. Generate a view results
Another step which you should be well versed in by now. If you have any problems with this step, check out some of the tutorials under AutoTag Basics

