Objective
To combine logical operators to create a complex filter set, while creating a list of all products shipped by a certain shipper AND where the shipping cost is less than a LowerCost parameter OR is greater than an UpperCost parameter.
Background Information
Suppose the character Spock from the Star Trek series asks you to filter a set of data. Logical beings such as the Vulcans can’t help but use logical operators from time to time, so either you’re on your own, OR you can read this tutorial AND learn how to create complex filters using the logical operators: AND and OR (AKA in the data wizards, all conditions, and any condition). It is also pertinent to know that many different data types can be compared, even dates and times.
Pre-requisites
Inserting a Tag, ForEach Tag, XPath - Part 1: Basic Selection, XPath - Part 2: Sorting with Orderby, XPath - Part 4: Filtering with Parameter ValuesStarting Template
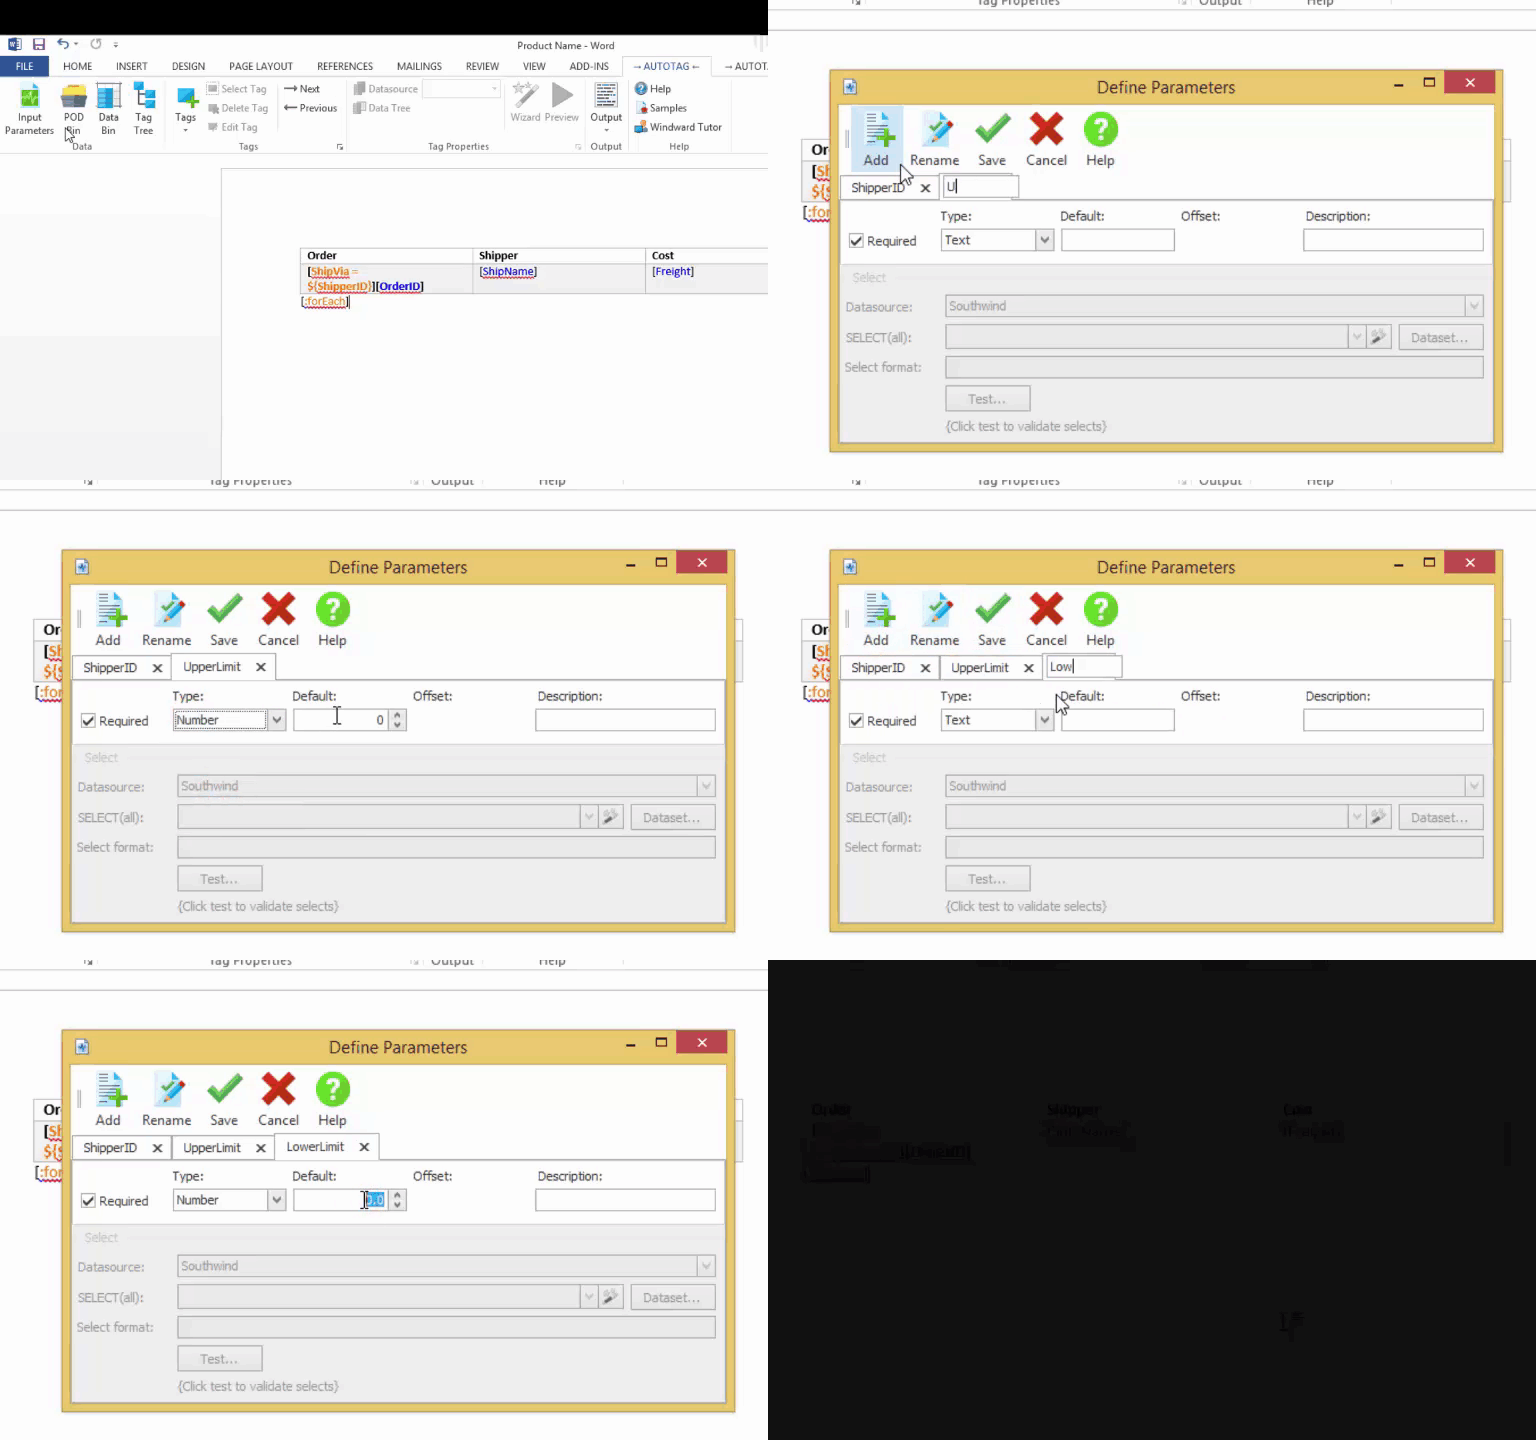
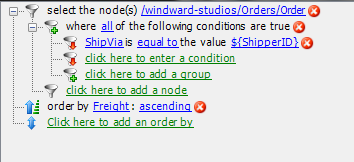
This tutorial is a continuation of the XPath Wizard tutorials, so we will start with the template from XPath - Part 4: Filtering with Parameter Values. If you haven’t already completed that tutorial, or you discarded the template, you should go back and create that template according to the instructions in the previous tutorials. The template needed is shown below. 
Procedure
1. Add 2 more Integer Parameters
We’re going to create two more parameter filters as done in Part 4 of the XPath Wizard tutorials, so from the AutoTag Manager ribbon, open up the Parameters window and create two parameters. The first is named LowerCost. It’s type is Integer and it’s default value is 5. The second is UpperCost which is an Integer defaulting to 10.
We are filtering out a range of values, so we want everything under a certain price, and everything over a certain price, but nothing in between. LowerCost is the lower end of that range and UpperCost is the upper end. This may seem like a nonsensical way to make a document, but the possibilities with AutoTag are endless, and sometimes it’s fun just to see how something is done, or to satisfy a curiosity!
2. Open XPath Wizard
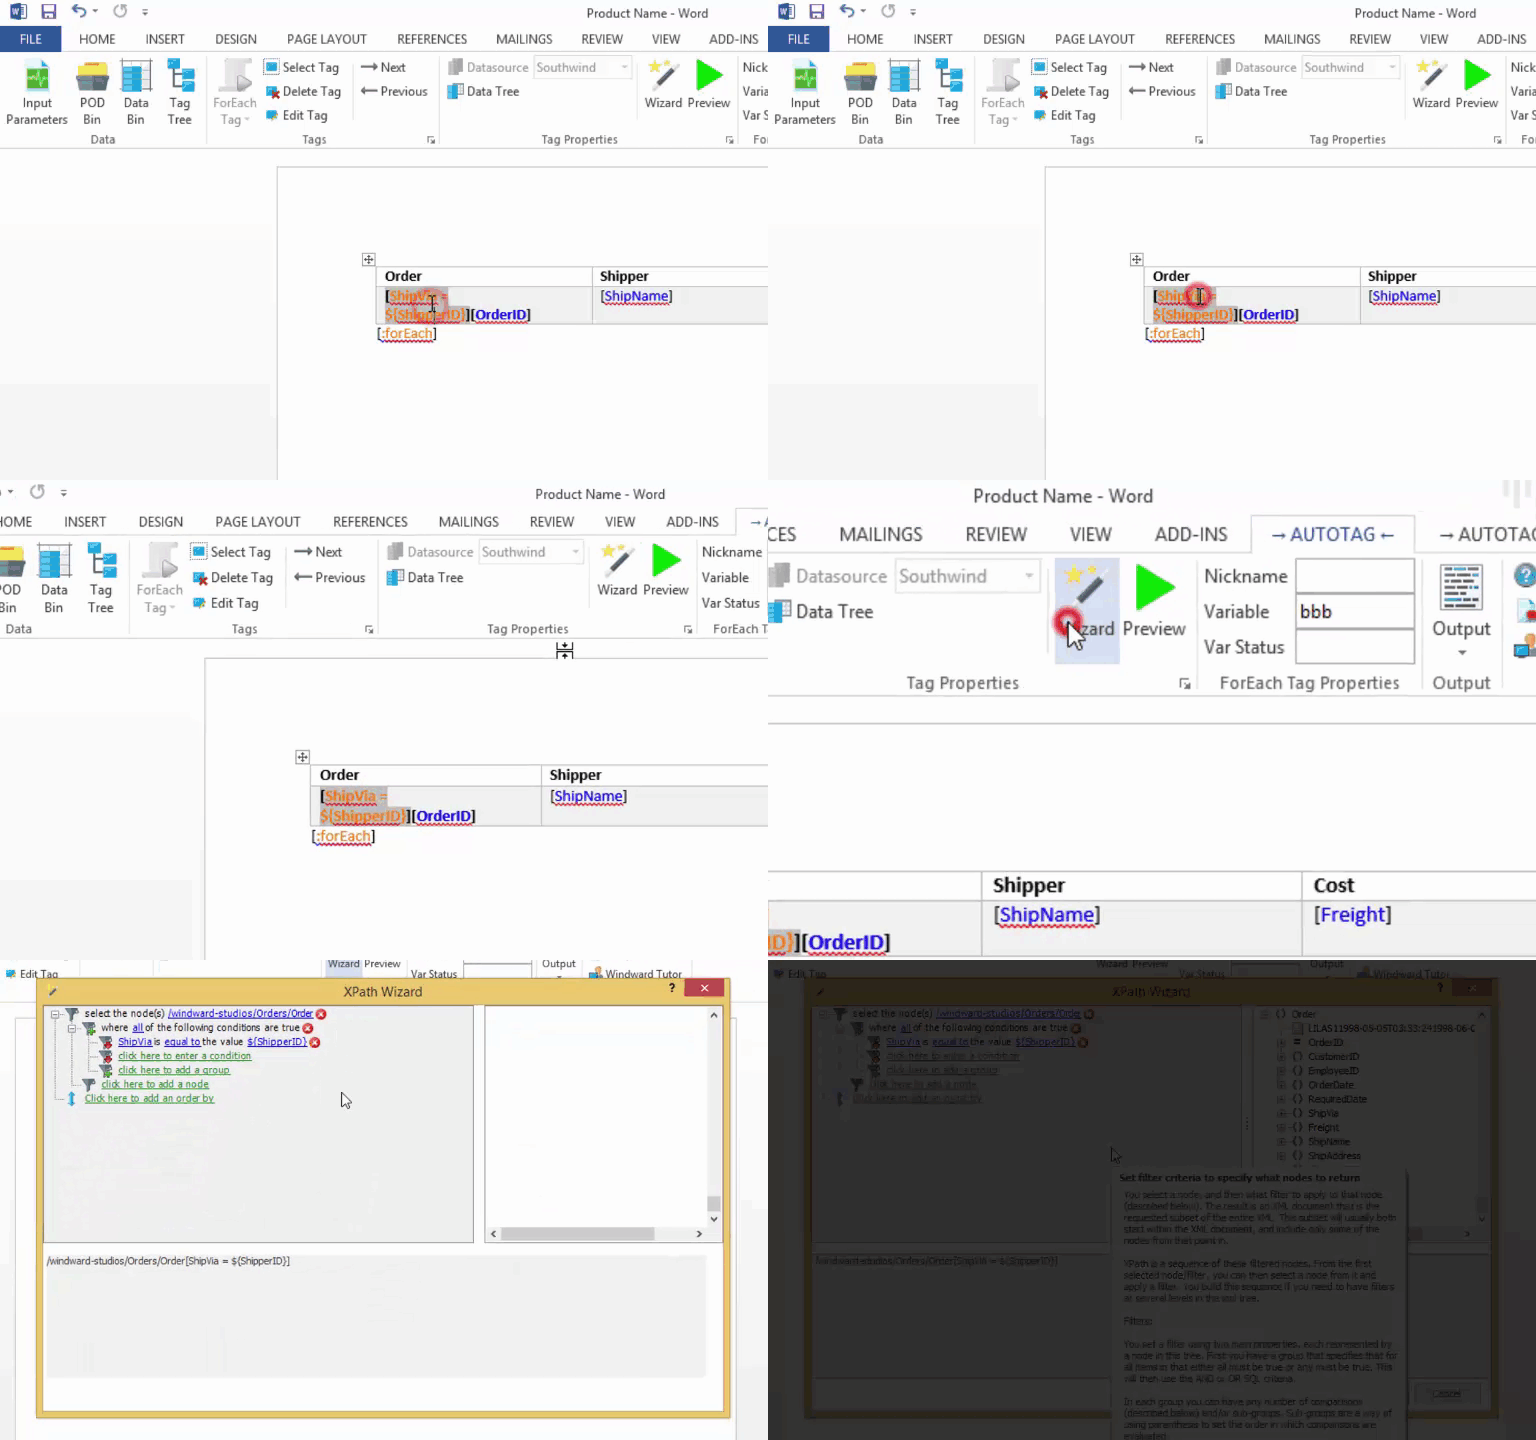
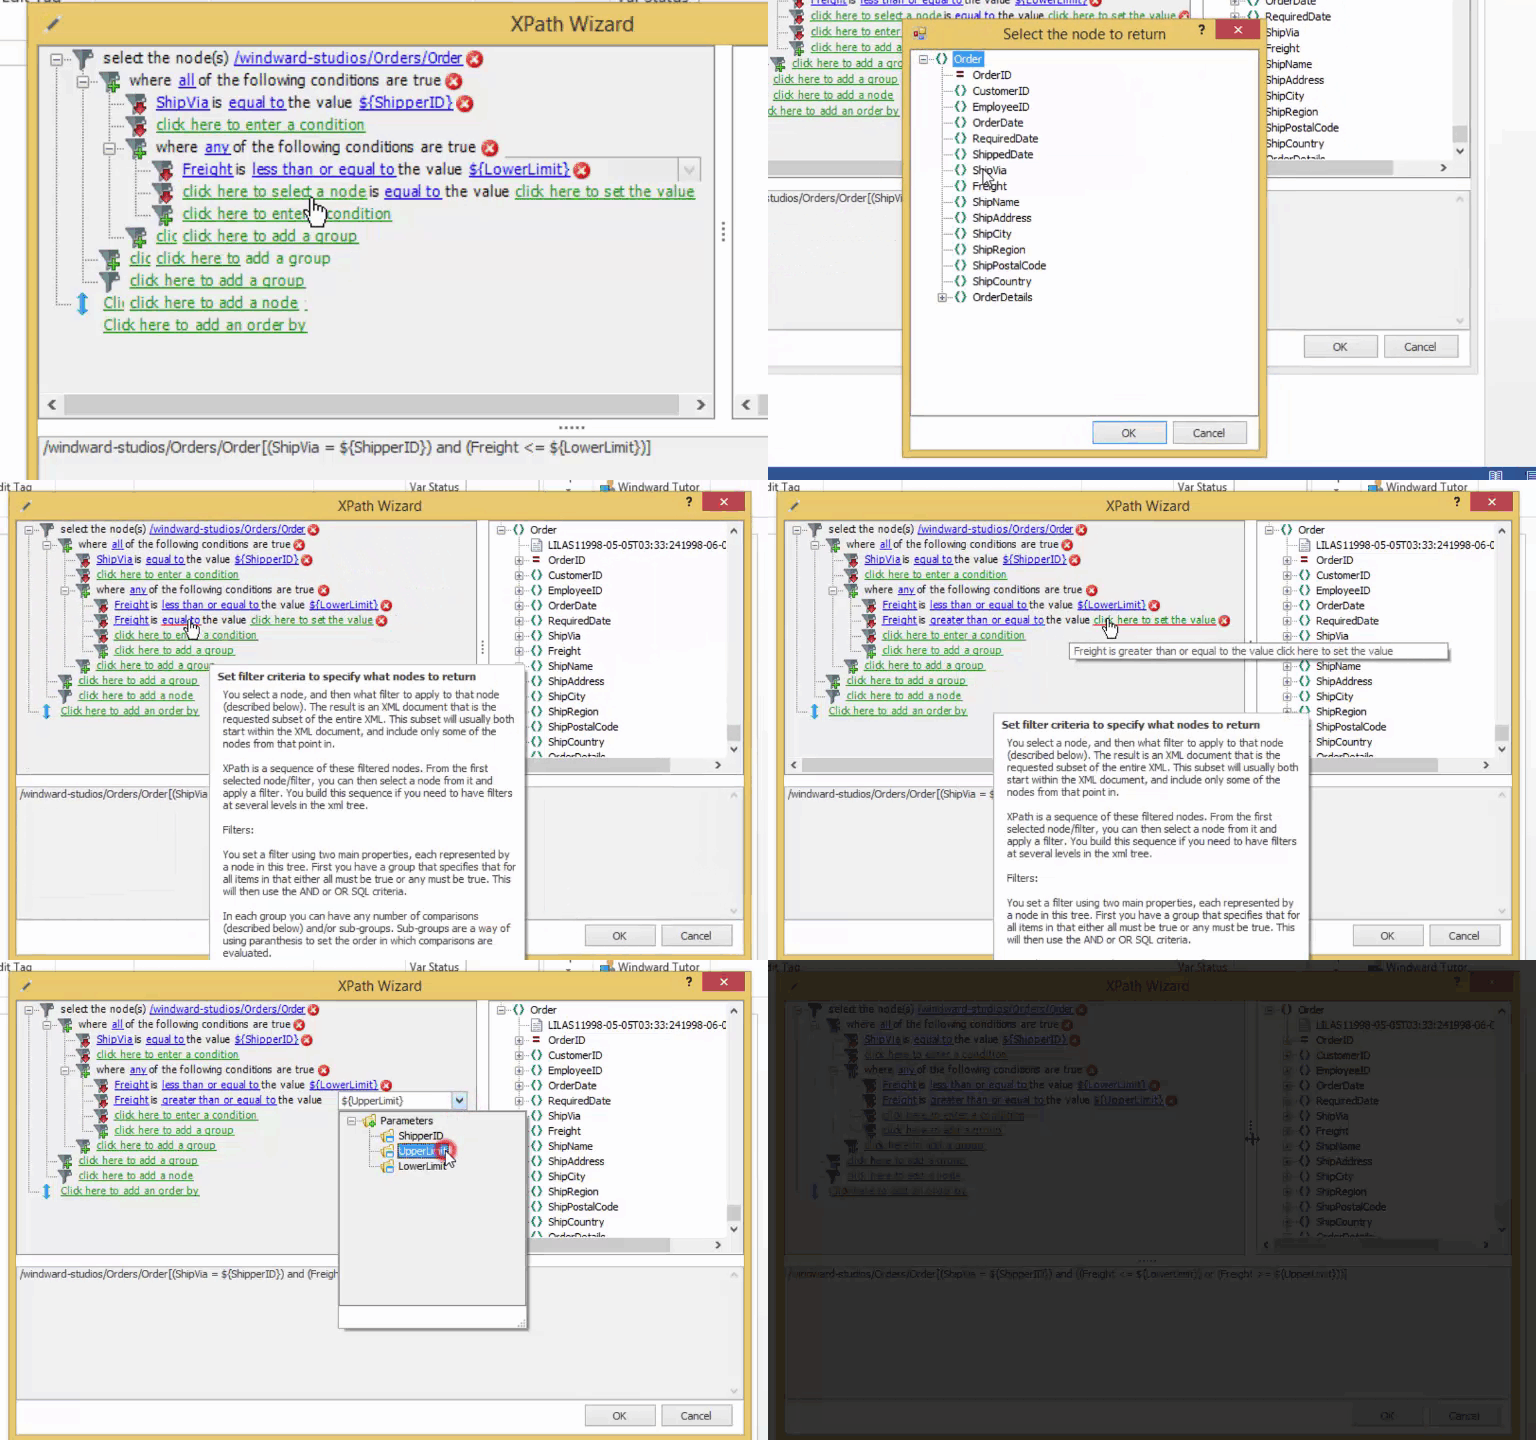
Now, open the XPath Wizard. Select the ForEach tag and click Wizard in the AutoTag ribbon. You know how to do this already!
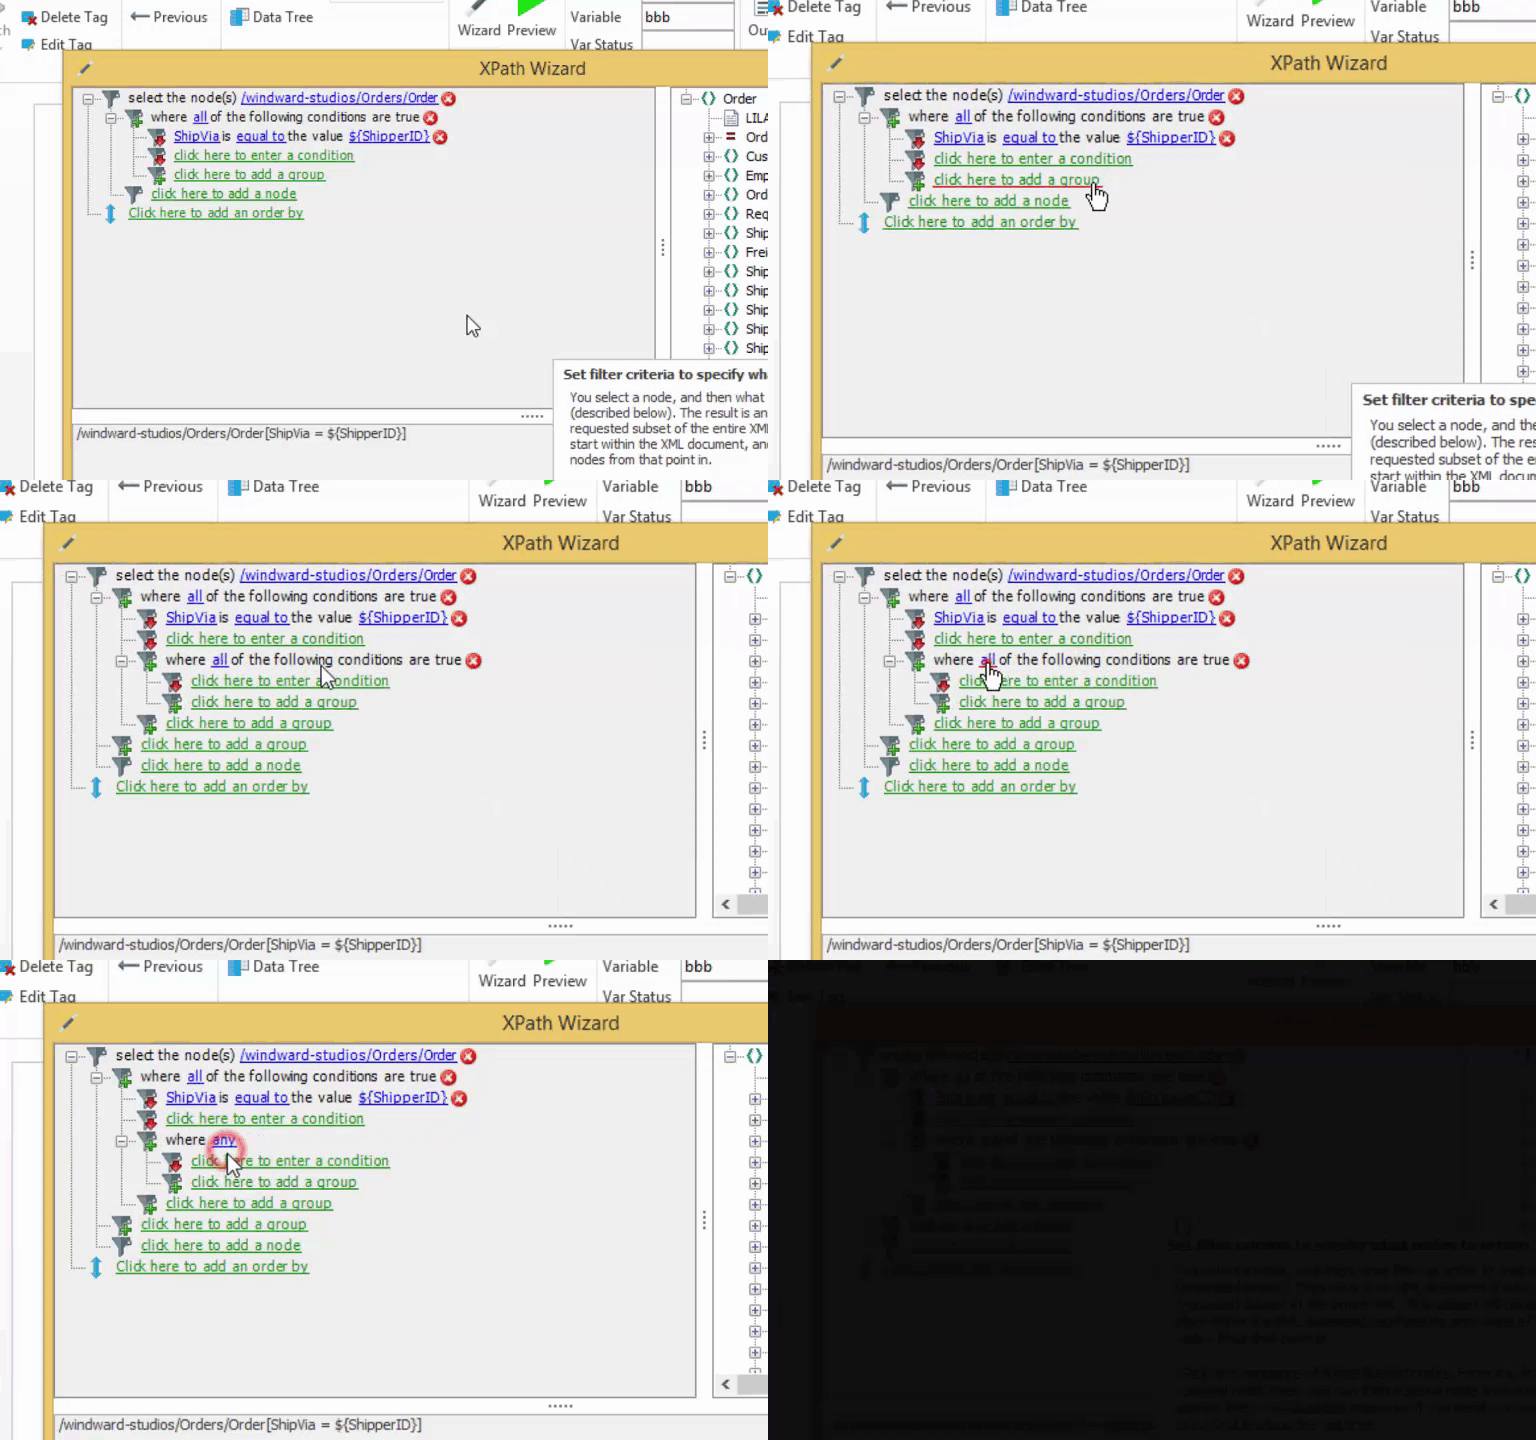
3. Add a group where any condition is true
You have added groups before, but this time the group and a condition are already there. The existing group says “where all of the following conditions are true.” Now we’re going to add a group within that group. Click to add a group, and clickall to replace it with any. What this means is we want A and either B or C. All of A, and (B OR C) must be true. For (B OR C) to be true, any of B or C must be true.
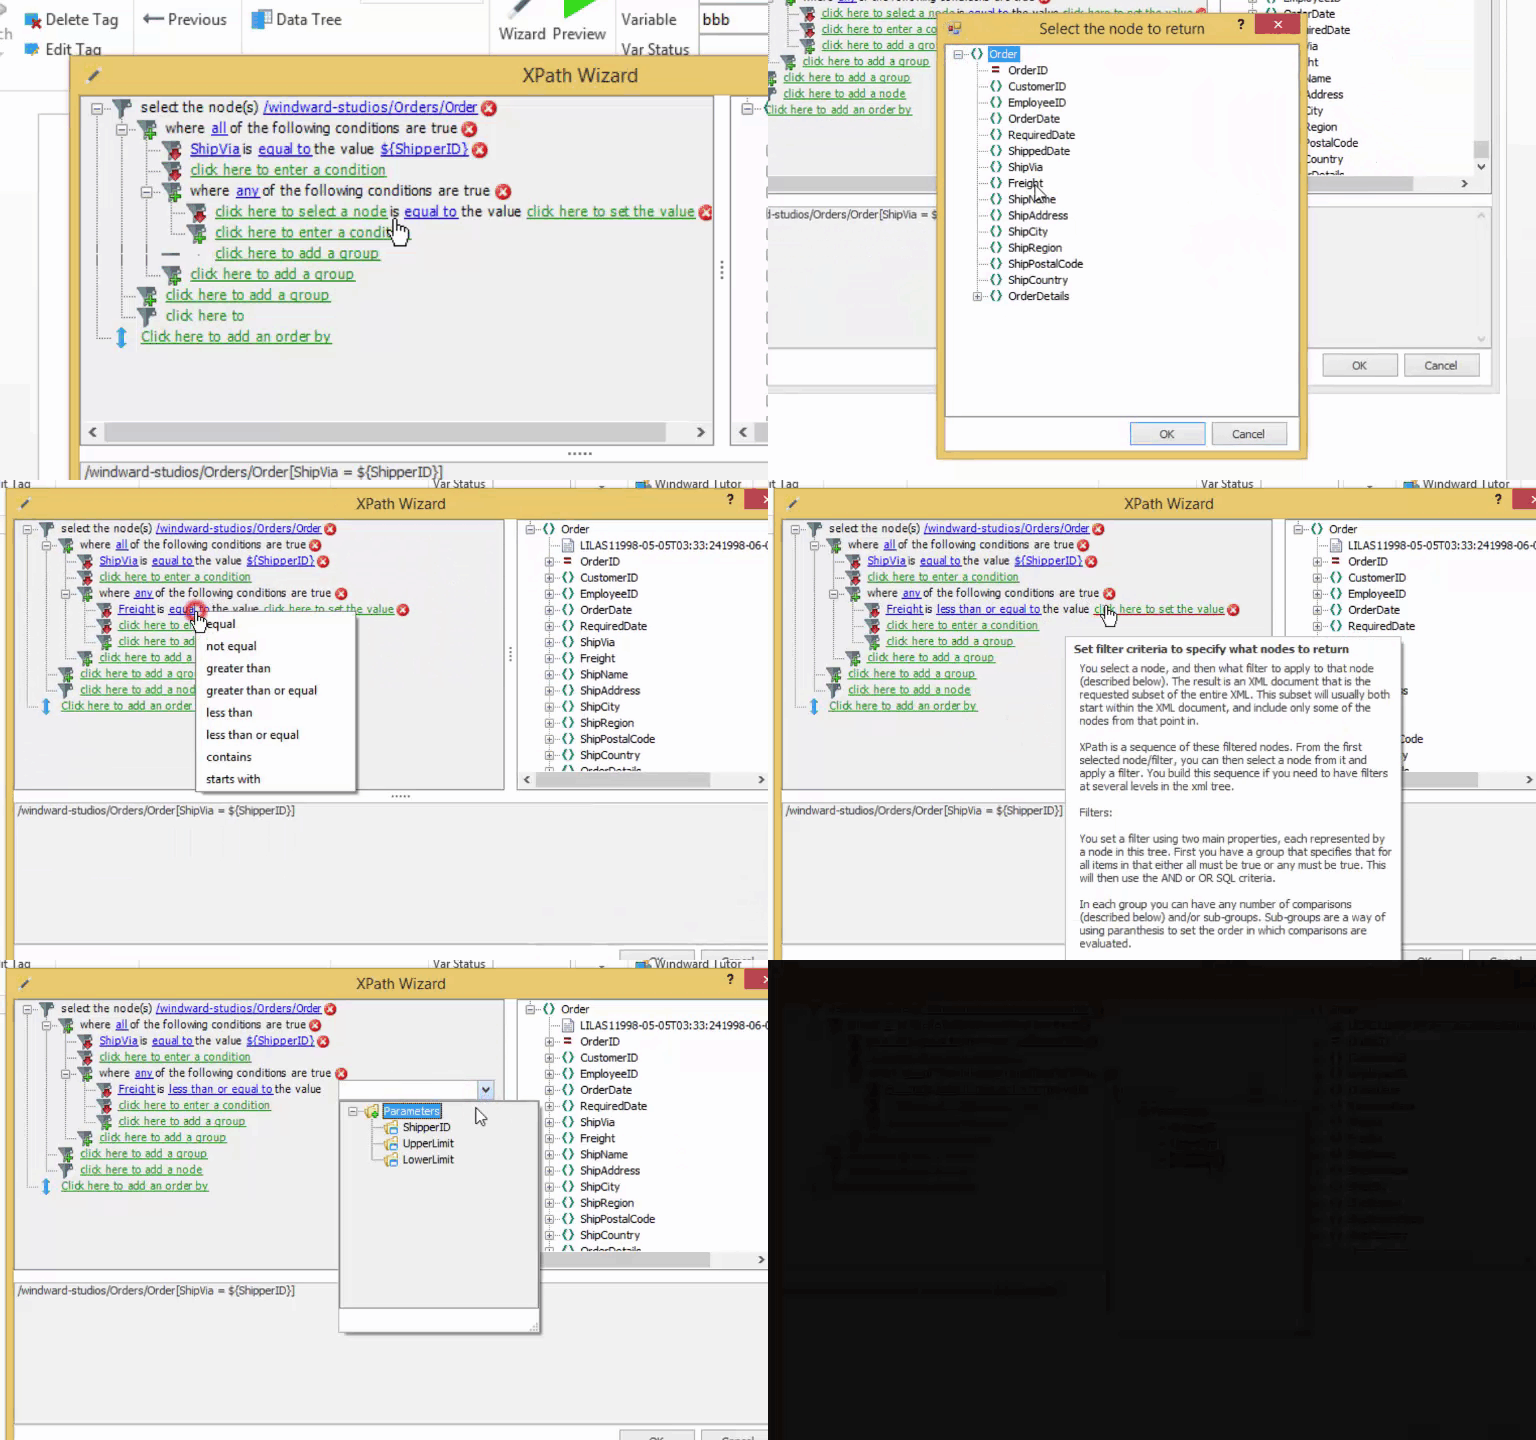
4. Add a condition such that Freight is less than or equal to $(LowerCost)
We are adding two conditions here, and you have done this before so this is simple. Click to add a condition, set thenode to Freight, click equal to and change it to less than or equal to, then set the value to $(LowerCost) by selecting the parameter from the list.
5. Add a condition such that Freight is greater than or equal to $(UpperCost)
Add the second condition just like the previous step, except this time it is greater than or equal to, and the value is $(UpperCost).
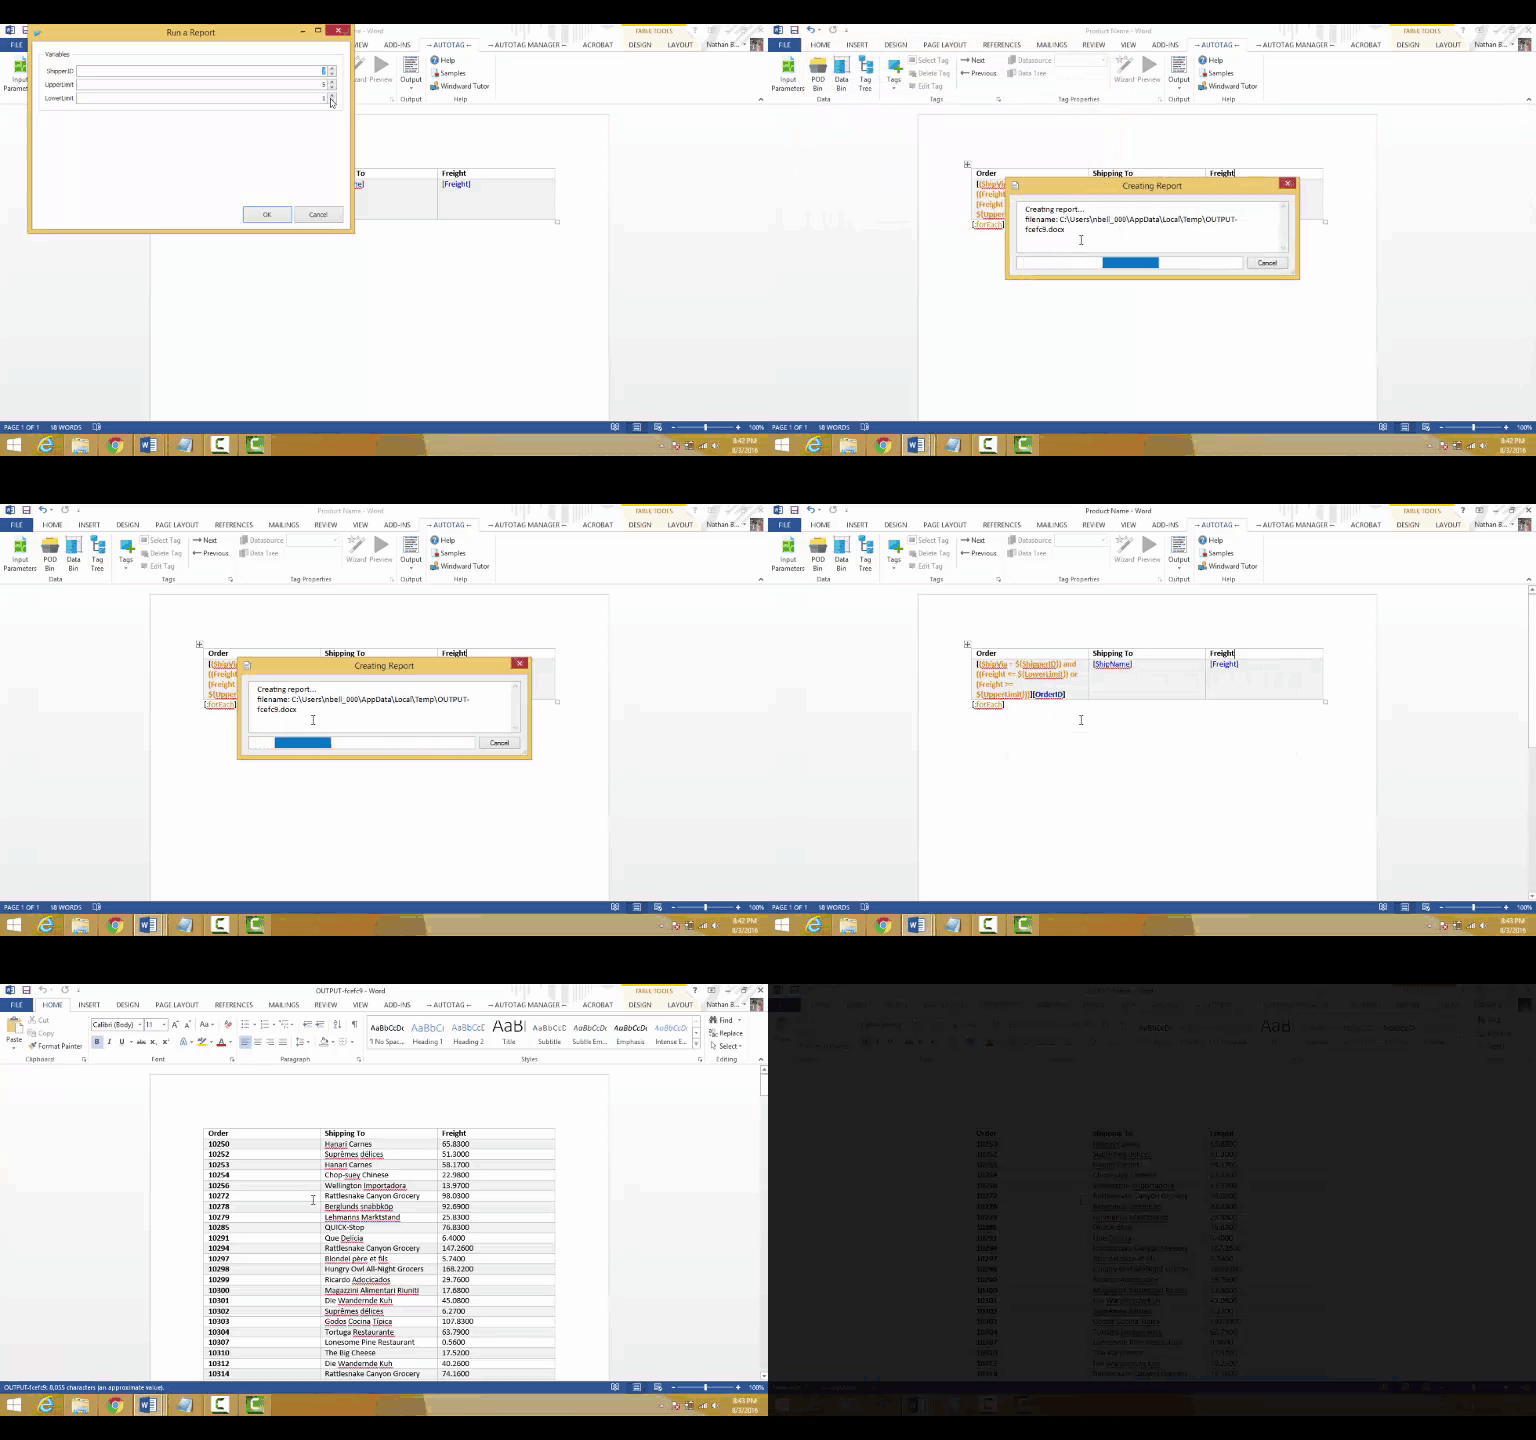
6. Set the parameters and generate the document
Just as in Part 4, you’ll generate the document by clicking output, then setting the Parameters. You have three to set this time! For this example document, we use 2 for the ShipperID, 1 for the LowerCost and 5 for the UpperCost.
