Objective
To filter data based on a single, static criteria through the creation of a simple document which displays a list of products shipped by a specified shipper.
Background Information
Now, we’re working with some data, we’re able to arrange it a little bit with the orderby feature we learned in the second XPath tutorial. What if we only want to see the products shipped by shipper 1? That’s exactly what filters are used for and we’ll learn how to do that in this tutorial. The next tutorial will teach you how to do the same thing with a more dynamic value (using variables).
Pre-requisites
Inserting a Tag, ForEach Tag, XPath - Part 1: Basic Selection, XPath - Part 2: Sorting with OrderbyStarting Template
This tutorial is a continuation of the XPath - Part 2: Sorting with OrderBy tutorial. If you haven’t completed that tutorial yet, you should go back and do it first, then start here with the template leftover at the end of Part 2. 
Procedure
1. Open XPath Wizard
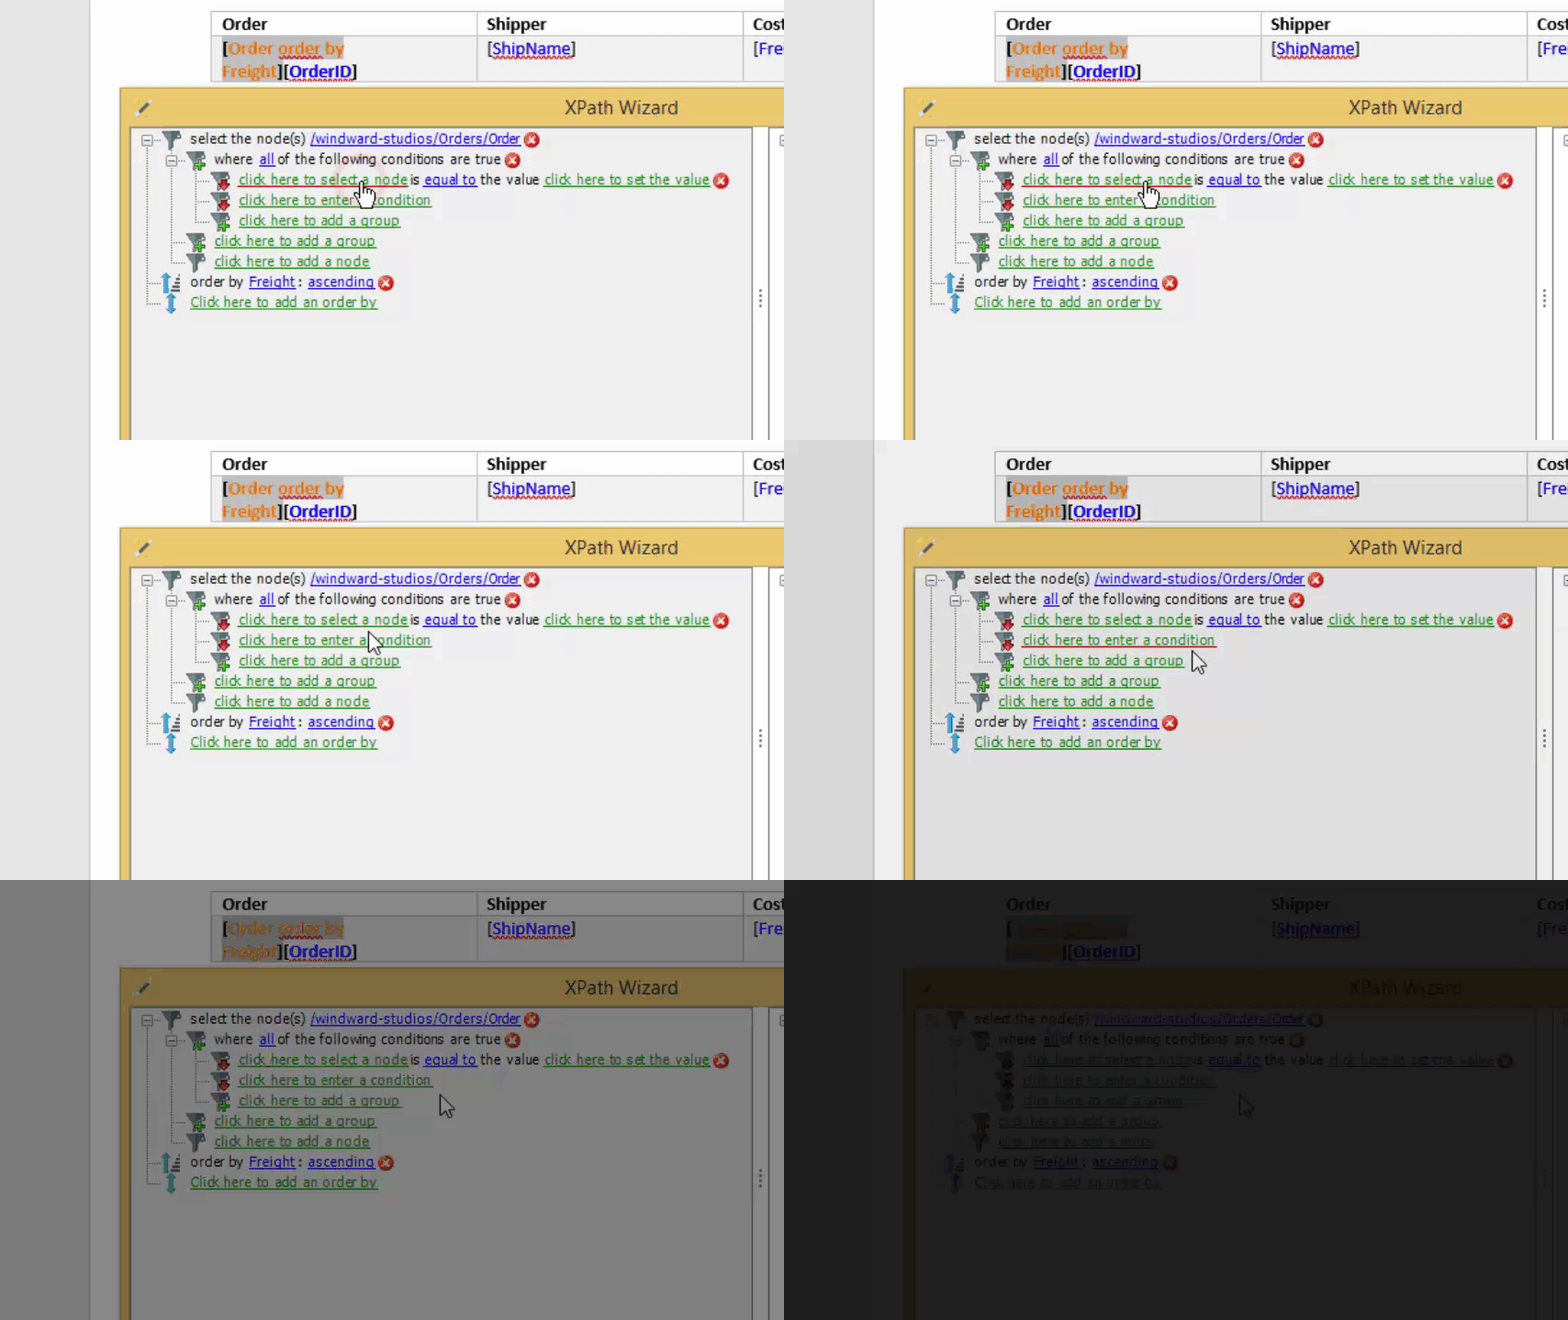
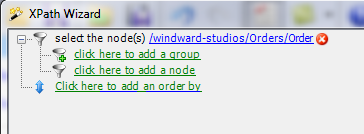
Start off by selecting the [forEach Order: tag and click the Wizard button as you have done in the previous tutorials, in order to open the XPath Wizard.
2. Add a group, then add a condition
In order to create a filter, we need to add a filter group, where we can then set a condition for the filter. Click the appropriate statements to do so.
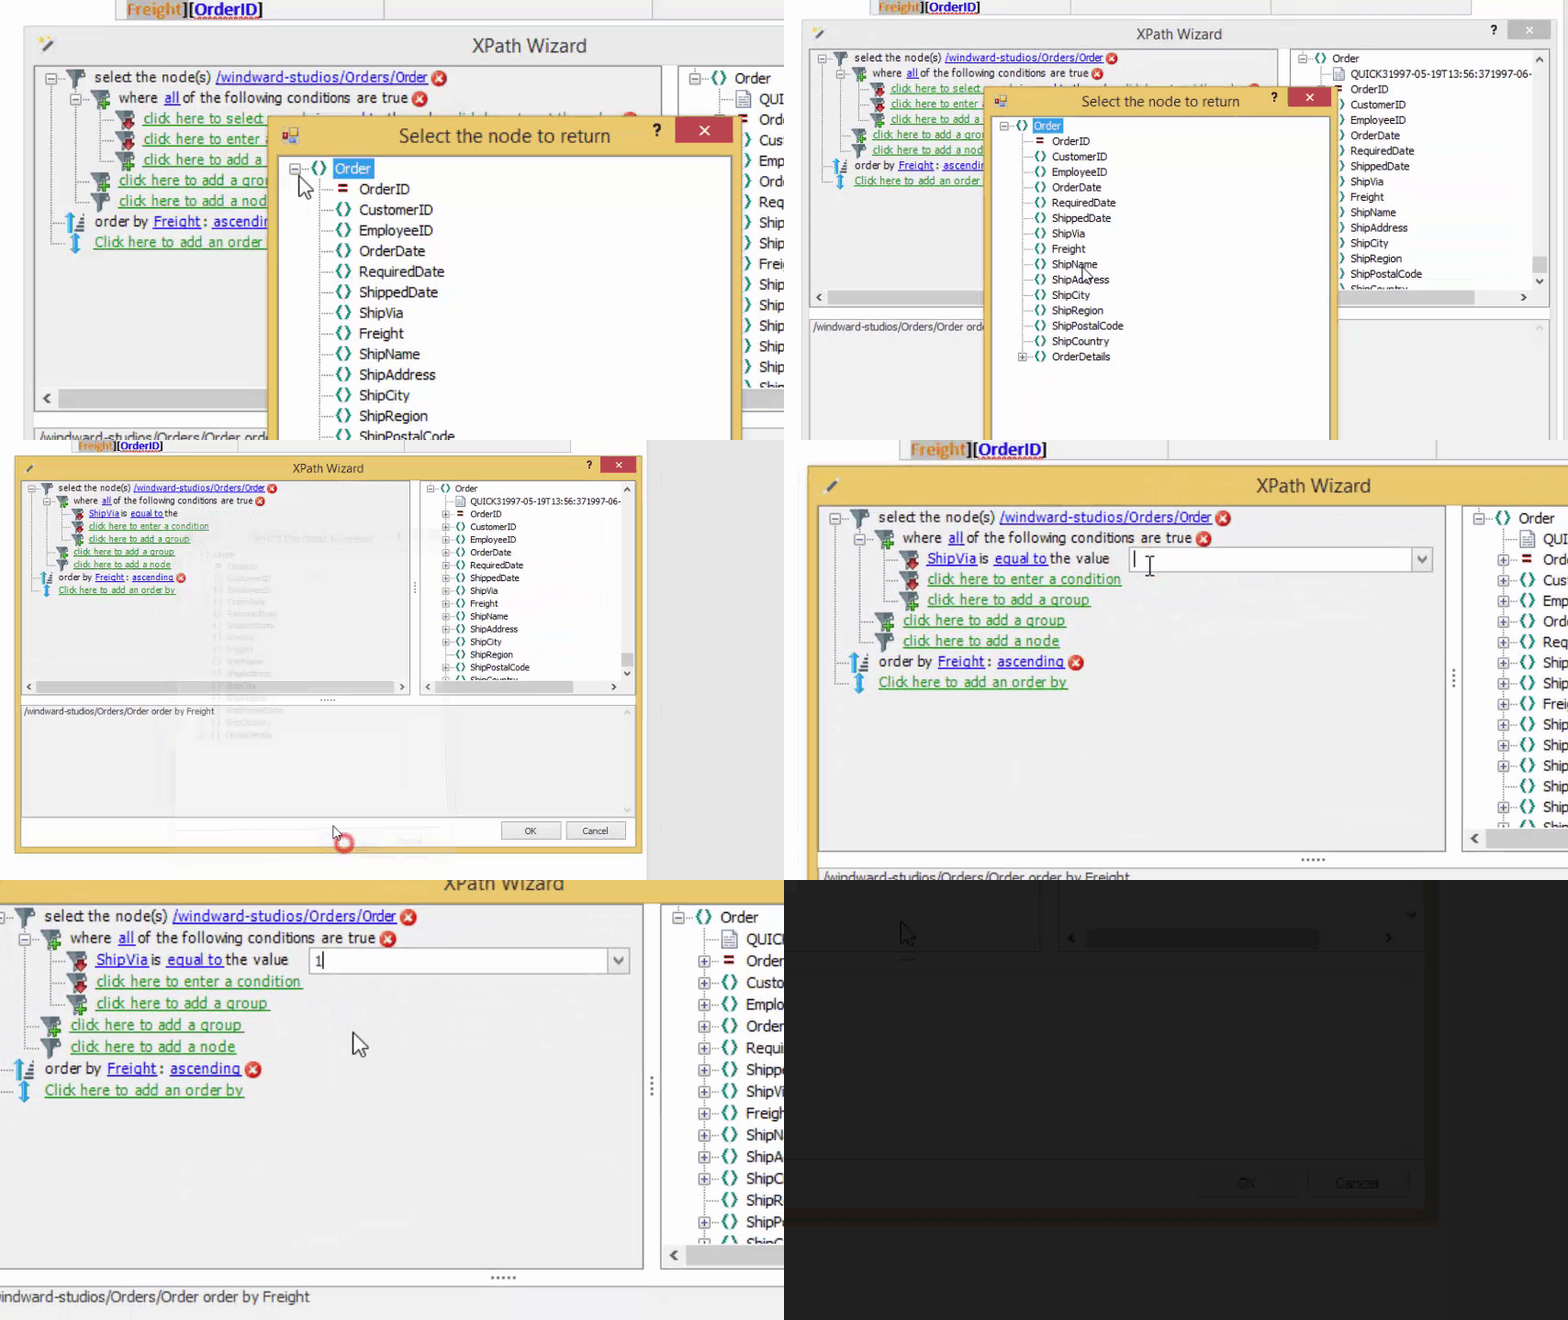
3. Set node to ShipVia
In the condition, there are left and right side values, the left is a field of your data, and the right is a value you test against. In the middle, it lets you select what type of comparison will be made. We’re going to set the left side to the ShipVia node, and we’ll leave the middle at equal to.
4. Set value to 1
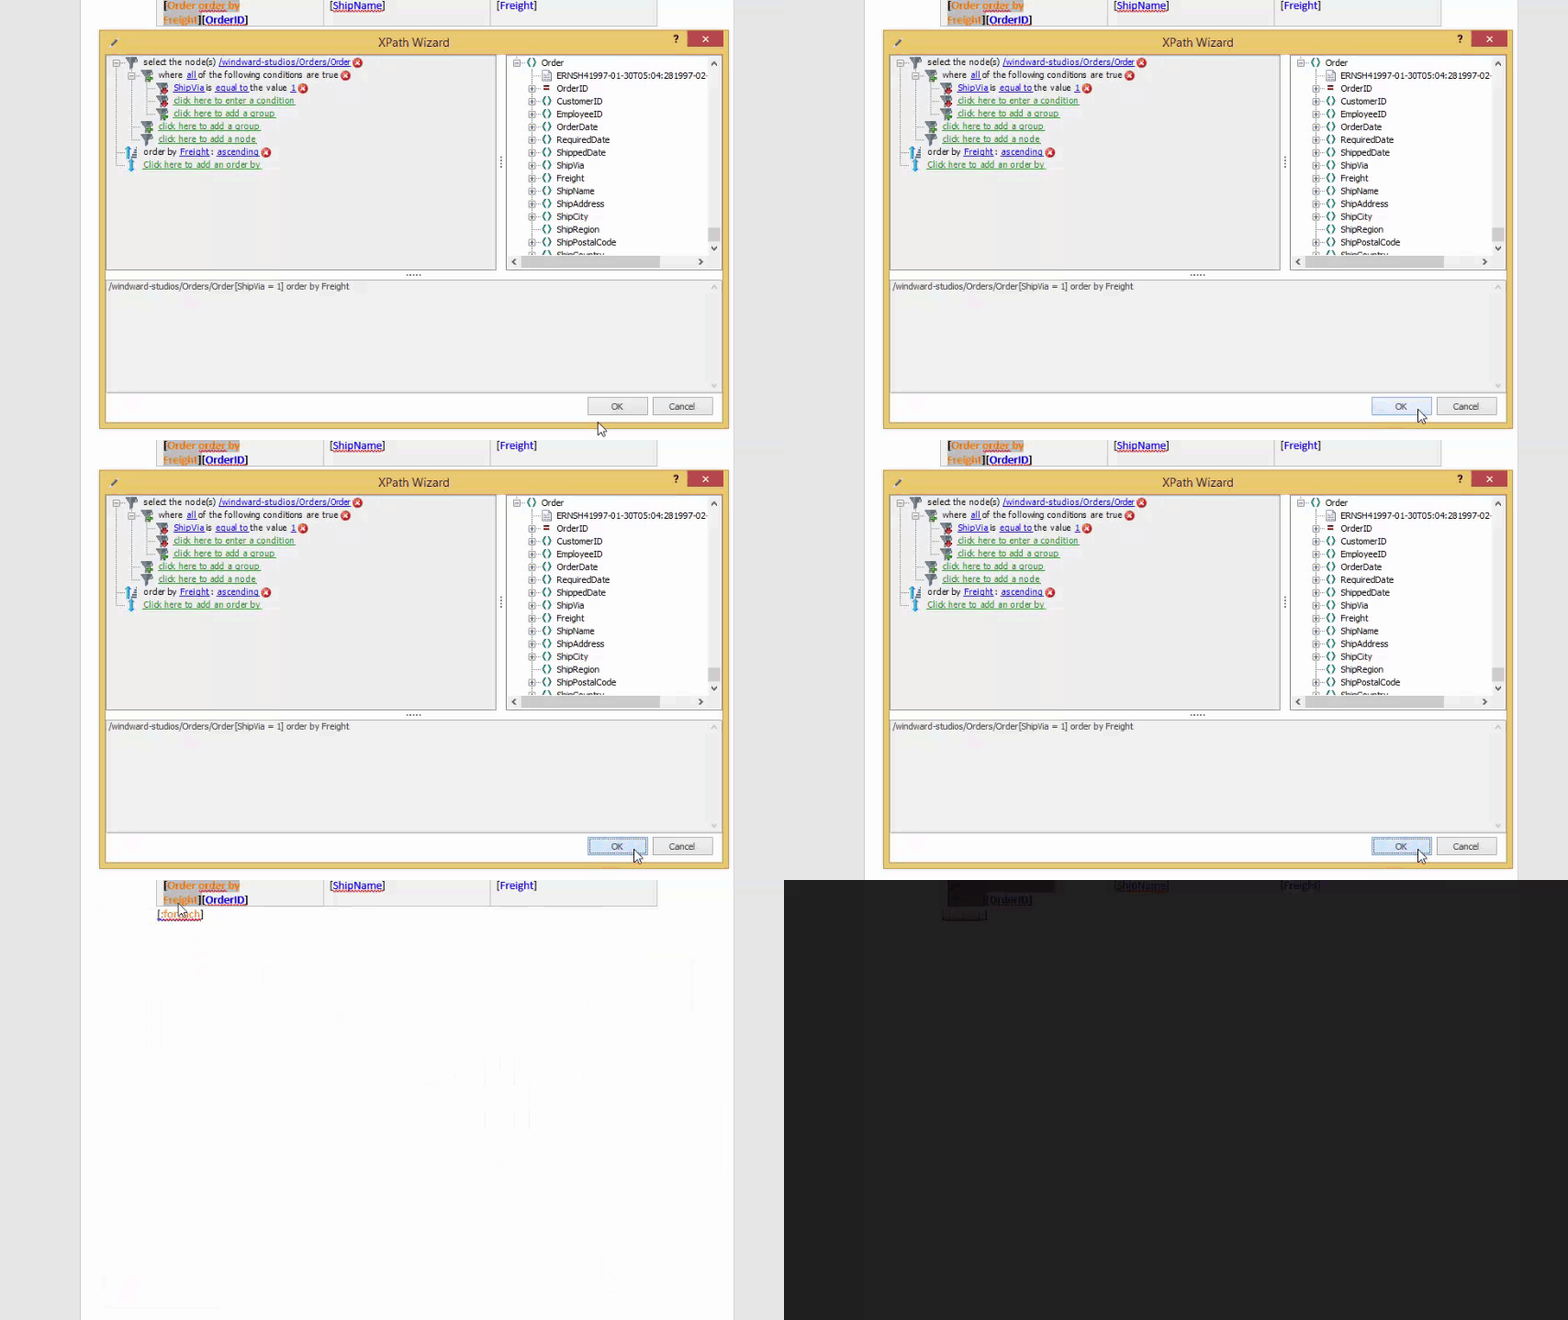
On the right side, we set a value to compare against. In this tutorial we are simply setting a static value here, so into the right side, set the value to 1. In the next tutorial, we’ll show you how to use a variable here instead.
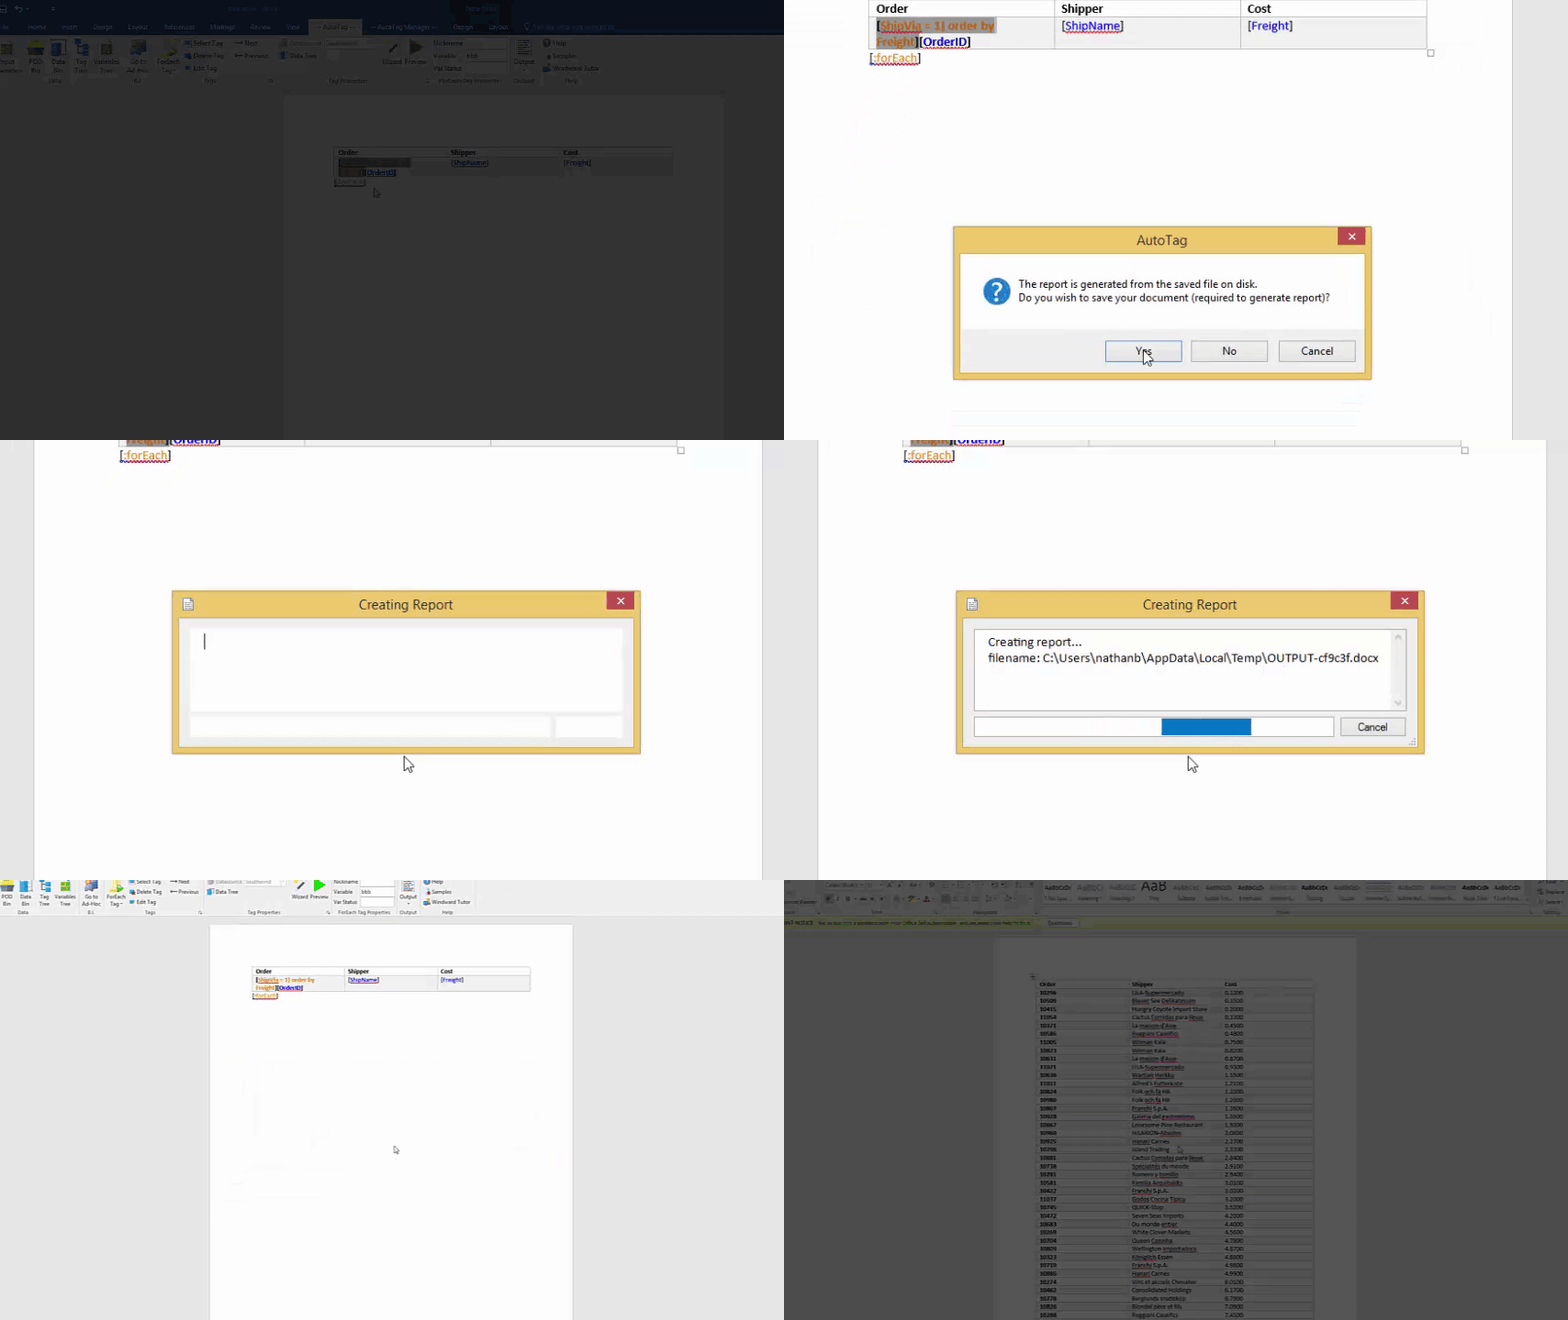
5. Generate and view results
Now, as you always do, close the wizard, generate the document and view the results!

